
A stair riser wrap is a thin finish layer applied to the vertical face of each step, the part between one tread and the next. Done well, it gives a tired staircase a new wood grain, stone, metal or solid color in an afternoon, without demolition. Done badly, it peels at the edges or changes the riser height enough to become a trip hazard. The difference comes down to the surface underneath, a precise measurement and a film that stretches and settles cleanly. That is what we build Bodaq interior film for, and this guide walks you through the whole job.
TL;DR
- A riser wrap is a finish, not a repair: the riser underneath must be sound, clean and dry before any film goes on.
- Measure every riser, not just one. In typical homes the riser is about 7 inches tall, so a strip is short but must be cut cleanly and square.
- Keep rise uniform: the US residential code limits the difference between the tallest and shortest riser in a flight to 3/8 inch, so keep added thickness minimal.
- Choose a film with a stretchable, air-channeled design and a pattern that works beside your treads, handrail and wall color.
- Allow the adhesive to cure before the stairs see regular traffic.
Table of Contents
- What a riser wrap is, and what it is not
- Why film works well on risers
- Choosing a pattern and color
- Measure before you buy
- Prepare the surface
- Installing the wrap, step by step
- Keep every step safe and within code
- Durability, cleaning and replacement
- Perspective
- Get started with Bodaq film
- FAQ
- Sources
What a riser wrap is, and what it is not
Stair treads are the flat surfaces you step on. They carry the load, so they have to be very durable and stable. Risers are the vertical boards between them, and they are more about looks than structure. That is why risers are the smartest place to start on a staircase refresh: they take far less wear than treads, yet they make up a large share of what you see as you walk toward a stair.
A wrap on a riser belongs to the family of finish layers. A riser overlay can be wood, tile, laminate or a purpose-made panel, and none of them can repair loose framing. The useful way to think about it is as a finish system: inspect the stair and the existing riser first, then choose materials and an attachment method that suit that substrate.
Film sits at the thin end of that range. It adds almost no depth, which matters on stairs more than anywhere else in a home (more on that below), and it follows the face of the riser instead of hiding it behind a new board.
Why film works well on risers
Peel-and-stick decal strips are the first thing most people find when they look for this. They are fine for a quick, temporary change. Architectural film is a different category: it is a premium, self-adhesive, stretchable material made for lasting refinishing of walls, furniture, doors and other surfaces in homes and commercial spaces.
Three things make it a good fit for a riser.
It is stretchable. Bodaq film is designed to stretch, so it can ease around slightly imperfect corners and edges without wrinkling or being cut into small patches. On a staircase where every riser is a little different, that tolerance saves time.
The adhesive is air-channeled. Our film uses an air-channeled adhesive that is designed to make installation cleaner and easier, which helps when you are working in a tight stairwell with a squeegee in one hand.
The catalog is wide. With more than 450 textures and colors, you can match the film to the rest of the interior instead of settling for the handful of patterns a decal pack offers. Our Wood Collection includes oak tones such as Natural Oak LW108 and Deep Walnut Oak LW109, and our solid colors suit the classic bright riser look.
For property managers and hospitality teams there is one more benefit: a riser refinish is quick work. Our film is designed to limit waste and disruption, so a staircase can be refreshed without closing a floor for long.

Choosing a pattern and color
Because risers endure less wear than treads, your choice can be driven more by design than by durability. A popular pairing is painted risers with natural wood treads, which balances a hard-wearing step with a crisp, light face. Film lets you get that look without repainting after every scuff, and it opens a few more directions.
Classic white and soft neutrals
White is not a single color. Paint makers offer whites with blue, gray, yellow and red undertones, and a shade that looks neutral on a small sample can look noticeably different next to wood flooring, a painted handrail or a wall color. Hold a large sample against the staircase itself, in the stairwell’s own light, at morning and evening. For a calm, modern look, a pale solid such as Silver Mist S263 is a good place to start.
Wood grain that matches the treads
If the treads are oak, an oak film on the riser creates the look of a fully wood staircase with a consistent grain. A slightly different tone, such as Sandstorm Oak LW116, gives gentle contrast instead of a perfect match, which often looks more intentional.
Stone, linen and leather textures
For a more sculptural stair, a stone texture such as Travertine NS202 or a woven finish such as Woven Linen SF803 adds an organic, textured band to every step. These work especially well in hospitality lobbies and in homes following the natural interior design trends that favor earthy materials.
Easy-clean surfaces for busy buildings
In commercial stairwells, where shoes scuff vertical faces constantly, a wipeable surface helps. Our Easy Clean ECF01 film belongs to the High-Performance Collection and is a natural candidate for those stairs.
Measure before you buy
In typical home construction, treads are 1 inch thick and 11-1/4 inches deep, the riser is typically 7 inches tall, and the tread overhangs the riser by 1-1/4 inches. Treat those as a guide only. Older houses, commercial stairs and custom staircases vary, so measure your own.
- Measure the height of each riser at both ends and the middle, from the top of the tread below to the underside of the tread nosing above.
- Measure the width of each riser between the stringers or walls.
- Note any step that differs from the others. Cut each strip to its own riser, not to an average.
- Add a small allowance on every side so you can trim in place, then cut it back to the finished size.
- Total the strip lengths and ask for a little extra for mistakes and for any later repair.
A tape, a straightedge and a notebook are all you need. Write down the stair number next to each measurement so that cut pieces match the right riser.
Prepare the surface
Preparation decides how long a wrap lasts. Check the substrate’s stability, wear resistance and slip resistance, and look for cracks or delamination before you resurface anything. Film follows whatever lies under it: a loose or crumbling riser will show through, and a failing one will lift the film with it.
For most risers the preparation routine is simple:
- Repair loose or damaged risers first. A wrap does not fix structure.
- Clean off dust, wax, grease and scuff marks, then let the surface dry fully.
- Fill dents and gaps so the face is smooth. Film will reproduce a rough surface.
- Check that the temperature in the stairwell is comfortable and steady before you start.
For the details that stop corners and edges lifting, our guide to five-step surface prep for film installers goes through each stage. Prepare one riser, test the film on it and see how it behaves before you commit the whole flight.
Installing the wrap, step by step
Here is the routine, with what each step demands and where it tends to go wrong.
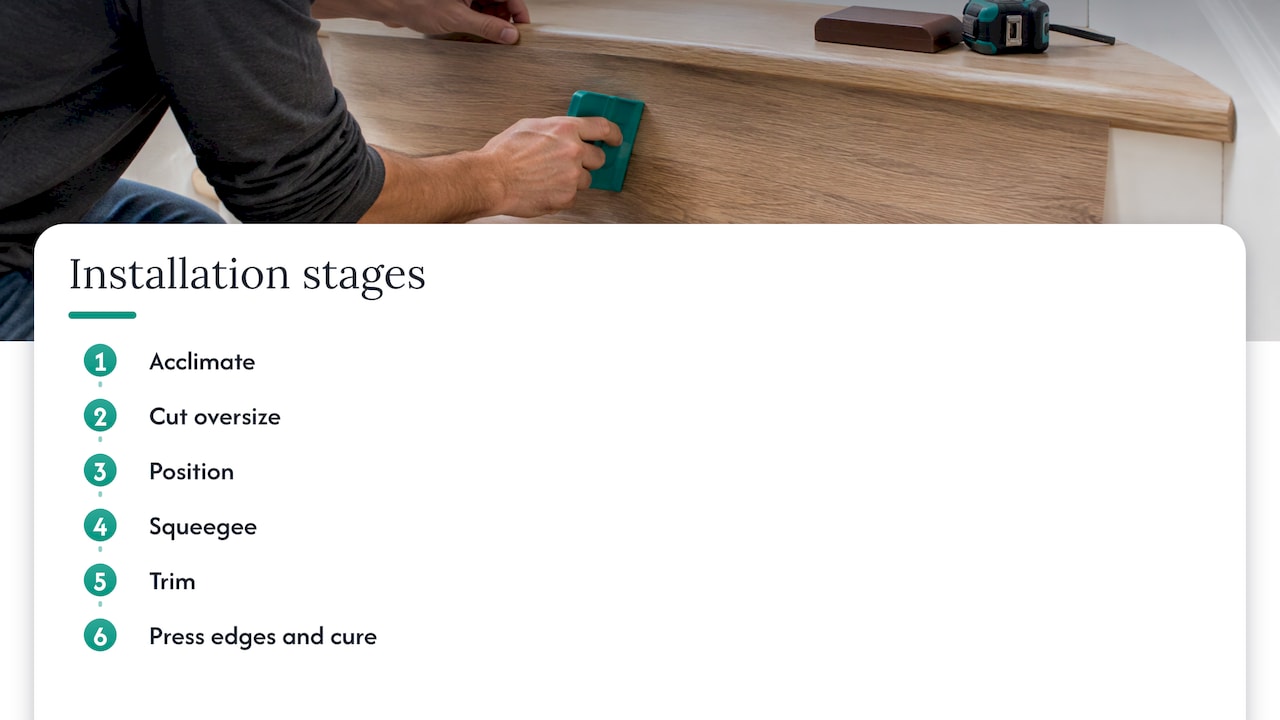
1. Acclimate the film
Bring the film into the stairwell ahead of time. Guidance for peel-and-stick tiles on stairs advises leaving the boxes in the room for 48 hours so the material adjusts to the room. The same habit helps with any adhesive-backed material: a cold roll behaves differently from a warm one.
2. Cut each strip oversize
Use a metal ruler and a sharp utility knife for straight cuts, and replace the blade often. A dull blade drags and leaves ragged edges. Cut with a few millimeters of allowance. The common mistake is cutting to the exact measurement and finding the strip a hair short at one end.
3. Position before you peel
Hold the strip against the riser and check it is level. Peel back only part of the liner, set the top edge, then work downward. Our film’s air-channeled adhesive is designed to let you press out air as you go, rather than trapping bubbles.
4. Squeegee from the center out
Work from the middle toward the edges with firm, even pressure. Where the riser meets the tread and the stringer, let the film’s stretch help you ease into the corner instead of forcing a crease.
5. Trim in place
Trim the surplus with a sharp blade against a straightedge. Keep the knife away from the tread surface and keep the cut shallow so you do not score the substrate.
6. Press the edges and let it cure
Go over every edge once more with the squeegee. Then give the stairs time. For peel-and-stick tiles, the guidance is to avoid walking on the stairway for 72 hours so the adhesive cures completely. Because that figure is for tiles, check how adhesive cure time works and use the instructions for the product you have. In a busy building, schedule the work so a second stairway stays open while the first one cures.
Work a flight at a time, top to bottom or bottom to top, and leave a clear way for people to move on the part you have not started.
Keep every step safe and within code
This is the part most decor articles skip, and on a staircase it is the part that matters most. Adding any material to a riser can make it a little shorter than its neighbors, and people judge their stride by rhythm. In the US, the International Residential Code limits the difference between the tallest and shortest riser in a flight to 3/8 inch, and the problem is often worst on the first and last step, where changes in floor finish alter the rise.
The 2018 IRC also sets a maximum riser height of 7-3/4 inches, a minimum tread depth of 11 inches (or 10 inches with a 3/4 to 1-1/4 inch nosing) and a minimum stairway width of 36 inches. A thin film adds almost nothing to riser height, which is one reason it suits stairs. Even so, measure the finished rise after you wrap, and if you are also changing the tread surface, count both.
A few practical checks:
- Measure the rise of every step after wrapping and confirm that the tallest and shortest are within 3/8 inch.
- Pay attention to the first and last step of each flight.
- Do not let a repair or finish create new hazards. Federal research on stair safety advises against changes that produce shadows or glare that make a tread edge harder to see, so choose a matte, non-reflective riser finish and check it under the stairwell’s real lighting.
- Keep contrast between riser and tread so the edge of each step reads clearly.
- Local codes differ and commercial stairs are held to additional rules. Confirm requirements with your local building department, and with the architect or code consultant on a commercial project.
If you manage a building, our overview of film installation safety is a useful briefing for installers before they start on a stairwell.
Durability, cleaning and replacement
Risers take scuffs from shoes, bags and vacuum cleaners, but they are not walked on, so they stay in good condition longer than treads. Our film is positioned around certified durability for high-traffic environments, and the surface is built to withstand daily wear in homes and commercial spaces.
For day-to-day care, wipe the film with a soft cloth and a mild cleaner, and avoid abrasive pads that dull a surface. For commercial stairs, the Easy Clean option above is made for just this kind of repeated wiping. Your installer or our team can confirm the recommended care for the pattern you pick.
When the time comes for a new look, a film riser is a lighter change than replacing boards or repainting a flight. Replacing it is much less disruptive than rebuilding the stair, which suits hotels and offices that update their design as their brand evolves.
Perspective
We designed Bodaq for the moment when a surface is structurally fine but visually finished. A staircase is the clearest example. The treads still work, the risers are sound, and yet the whole flight reads as dated.
What we see in a riser refinish is a design opportunity as much as a repair. Each step becomes a band of pattern that you pass at eye level while you climb. A wood grain that continues from the floor, a stone texture that echoes the lobby or a deep solid that pulls a bold wall color down the stair can change the character of a whole room.
The film is built for that job. It stretches, so it follows the surface, and its air-channeled adhesive is designed to help you get a clean finish. With over 450 textures and colors, you are not choosing from a few stock patterns: you can match the stair to the doors, the joinery and the walls that surround it.
Our advice is to treat the stair as part of a system. Prepare the surface properly, measure each riser, keep the rise uniform, and select a finish that sits well with your treads, handrail and lighting.
Bodaq
Get started with Bodaq film
If you are planning a staircase refresh, the Bodaq collections cover wood, metal, stone and marble, solid colors, and fabric and leather, so you can find a riser finish that fits your interior. We also offer samples, installation tools and certified installer training for teams who want a consistent result across many stairs.

Browse the full range on the Bodaq Interior Film site, pick two or three candidates and hold the samples against your treads and handrail in the stairwell’s own light before you decide.
FAQ
Can you wrap stair risers with film?
Yes. Risers are the vertical faces between treads and are not the walking surface, so they take less wear than treads. Film is a thin finish, so it adds very little to the rise. Prepare the surface properly and wrap each riser individually.
Does a riser wrap change the riser height?
A thin film changes it very little, but you should still measure. The residential code allows a difference of no more than 3/8 inch between the tallest and shortest riser in a flight, so check the first and last steps in particular and confirm local requirements with your building department.
How long should I stay off the stairs after installing?
Guidance for peel-and-stick tiles on stairs is 72 hours for the adhesive to cure. Because products differ, read our note on adhesive cure time and follow the instructions for the film you use. Plan access so the stairs can rest.
What is the difference between a stair riser and a tread?
The tread is the horizontal surface you step on, and it must be very durable and stable. The riser is the vertical board between treads, and it is mainly about looks. A riser wrap goes on the riser only. Check any tread surface change separately for rise and slip resistance.
What surface should the film go on?
A sound, clean, dry and smooth riser. Check for cracks and delamination first, repair anything loose, and fill dents. Our guide to surface prep for film explains how to avoid edge lifts.
Sources
- Stair Treads and Risers: Best Wood Species for Stair Treads
- What Is a Stair Riser Overlay?
- White Risers on Stairs: Design, Materials, and Maintenance
- What You Need to Know Before a Staircase Makeover, HGTV
- How To Install Peel-And-Stick Tiles On A Stairway, Hunker
- How to Cover Interior Stairs: Complete Guide to Choosing the Best Materials
- Guidelines for stair safety, NIST


