
Clean with detergent, degrease if there’s oil or wax, finish with a 70/30 isopropyl alcohol wipe, then install immediately while the substrate is still clean and dry. That sequence, run panel by panel, is what separates a film that lasts for years from one that lifts at the seams within weeks. The exceptions that trip up even experienced installers: fresh paint that hasn’t fully cured, porous wood that needs sealing first, and textured surfaces that demand an adhesion test before you commit a full roll.
TL;DR:
- Proper surface preparation involves a sequence of inspection, cleaning, degreasing if needed, and an immediate IPA wipe to ensure the film adheres long-term.
- Porous, textured, or freshly painted surfaces require specific treatments such as sealing or curing time before film application to avoid future lifting or bubbling.
- Use non-wax, non-polishing cleaners, solvent degreasers in well-ventilated areas, and avoid ammonia-based cleaners to prevent damage to adhesives.
- Conduct adhesion tests on small patches immediately before installation to verify surface readiness, especially on challenging substrates like textured walls or metal.
- Work within recommended environmental conditions and panel-by-panel workflow to prevent dust resettling and contamination that compromises adhesion.
Table of Contents
- How Do You Prep a Surface for Film Application?
- Substrate-Specific Prep: What Changes by Material
- Which Cleaners and Chemicals Actually Belong in This Process?
- Tools and Environment: Setting Up the Workspace Right
- How Do You Verify a Surface Is Ready for Film?
- Bodaq-Specific Prep Notes and Installer Resources
- What Experienced Installers Do Differently
- A Primer-and-Film System Built for Predictable Results
- Sources
- FAQ
How Do You Prep a Surface for Film Application?
A reliable film install lives or dies on five steps, done in order, on one panel at a time. Skip the sequence or batch-clean a whole room hours ahead of installation, and you’re inviting dust, humidity, and airborne oils back onto the surface before the film ever touches it.
- Inspect the surface. Check for dents, uncured coatings, old adhesive residue, or contamination that would telegraph through the film or block adhesion.
- Wash with a neutral detergent and warm water. This lifts loose grime and particulate without leaving behind waxy residue.
- Degrease if needed. Oils, waxes, and polishing compounds call for a solvent degreaser before you move to the final wipe.
- Finish with an IPA wipe. A 70% isopropyl alcohol / 30% water mix, applied right before install, is the step Avery Dennison’s substrate prep bulletin treats as non-negotiable.
- Dry, tack, test, install. Let the panel dry fully, wipe with a tack cloth, run a quick adhesion check on an inconspicuous spot, then apply the film.
Wear nitrile gloves and eye protection when handling solvents, and keep the workspace ventilated. Fumes from degreasers build up fast in closed rooms.
Pro Tip: Clean only the panel you’re about to cover. Cleaning an entire wall or vehicle hours before install just gives dust and moisture time to resettle before the film ever gets there.
Substrate-Specific Prep: What Changes by Material
Surface prep for film isn’t one-size-fits-all. Paint, wood, metal, and powder coat each carry their own failure points, and the wrong assumption on any of them shows up later as a bubble, a lifted edge, or a section that never bonded at all.
- Painted surfaces: Confirm the paint has fully cured per the manufacturer’s own timeline before laying film. Skip ammonia-based cleaners entirely. If a test patch shows weak adhesion, a primer coat is the fix rather than forcing the film to grip an incompatible finish.
- Wood and veneer: Porous substrates need sealing before film goes down. Sand repair spots to 320–360 grit, vacuum or tack off every trace of dust, and confirm the wood is completely dry. Residual moisture under film on wood is one of the more common causes of delayed bubbling.
- Metal: Degrease thoroughly since metal panels often carry invisible oil films from machining or handling. Watch for surface corrosion, and consider an adhesion promoter on surfaces where the initial test comes back marginal. 3M’s DI-NOC installation guidance specifically calls for primer on porous or problem substrates rather than skipping straight to film.
- Powder coat and textured walls: Always run an adhesion test first. Marginal results mean either a primer step or, in some cases, reconsidering film as the right finish for that texture.
If a freshly painted or coated surface is still outgassing, or humidity in the room is running high, delay the install. No amount of careful cleaning compensates for a substrate that’s still curing underneath the film.
Which Cleaners and Chemicals Actually Belong in This Process?
The chemistry matters as much as the sequence. Start every job with a basic detergent and warm water wash for general dirt and dust. This is your baseline for cleaning before vinyl wrap or any decorative film install, and it’s gentle enough not to introduce new contamination.
- Skip any cleaner marketed with wax, polish, or “lotion” additives. Those leave a film-blocking residue behind, which defeats the purpose of cleaning in the first place.
- For grease and oil, move to a solvent degreaser such as VM&P naphtha or xylene, used with gloves and real ventilation. These solvents flash off fast, but the fumes are not something to breathe in a closed garage.
- Close the process with the 70/30 IPA wipe and install right after, not the next morning.
- Never reach for ammonia-based glass cleaners. Avery Dennison’s bulletin flags ammonia as damaging to pressure-sensitive adhesives, and that damage often doesn’t show until the film starts failing weeks later.
- Test any new cleaner on a small hidden area before running it across a full panel.
Manufacturer bulletins from Avery Dennison and 3M land on nearly the same order of operations. That convergence between two major players is worth treating as the industry’s practical standard, not just one brand’s preference.
Tools and Environment: Setting Up the Workspace Right
The right tools keep contamination from creeping back in between cleaning and install. Stock a range of squeegee sizes, lint-free microfiber towels, tack cloths, a heat gun for edge work, a clay bar for stubborn particulate, spray bottles for your cleaning mixes, and lint-free gloves to keep skin oils off the surface.
Temperature matters more than most installers expect. Work within the range specified in the film’s own installation documents, since going outside it affects how the adhesive activates. Control dust in the room, and on vehicle wraps or metal panels, ground the surface to cut down static that pulls debris right back onto a freshly cleaned panel. 3M’s vehicle prep guide even recommends against sweeping the shop floor mid-installation, since that alone can kick enough particulate into the air to ruin a clean panel.
- Clean one panel at a time, then install it before moving to the next.
- Keep any cleaned-but-not-yet-installed panel covered.
- Mark cleaned panels so nobody re-touches them with bare hands before install.
Pro Tip: Treat your prep day like a dedicated event, not a task squeezed between other jobs. A rushed clean is the single most common shortcut that shows up as adhesion failure two weeks later.
How Do You Verify a Surface Is Ready for Film?
Don’t guess. A short adhesion check before full installation catches problems while they’re still cheap to fix.
- Run a fingernail or tape test. Apply a small film sample, press it firmly, then try to lift an edge with a fingernail or a strip of tape. It should resist without peeling cleanly away.
- Use a 3M-style adhesion test on a trial patch. Apply, wait the recommended dwell time, then check for full contact and no edge lift.
- Document the trial. Note the time, room temperature, and humidity alongside the result, since a passing test today doesn’t guarantee the same result on a humid afternoon.
- Act on failure. Re-clean the surface, apply a primer, or delay the job entirely if a coating is still curing or the room is outgassing.
This kind of documented trial run mirrors what production crews do with camera and lighting setups before a full shoot. Testing small before committing large avoids expensive rework either way.
Bodaq-Specific Prep Notes and Installer Resources
Certain architectural films are self-adhesive and stretchable, which changes a few habits from standard vinyl work. The stretch tolerance means edges and corners can be worked with gentle heat rather than forced, but that same flexibility makes a poorly cleaned edge more likely to lift over time since the film keeps working against a weak bond.
- On porous or slightly textured walls, apply Bodaq Water-Based Primer (3 KG) after the IPA wipe and before film goes down. It gives the adhesive a more consistent surface to grip.
- For smooth, solid-color walls or furniture, a film like Easy Clean ECF01 typically needs nothing beyond the standard detergent and IPA sequence.
- Stone-look finishes such as Rustic Stone EXF52 go over textured substrates more often, which makes the adhesion test step worth doing every time rather than skipping it on familiar walls.
- For step-by-step technique on edges and seams, Bodaq’s installation guide covers tool use in more depth than a prep checklist alone can.
What Experienced Installers Do Differently
The mistake that costs the most time isn’t a bad cleaner choice. It’s rushing the final IPA wipe or skipping the adhesion test because the last ten jobs went fine without one. Environmental control gets ignored the same way, usually by installers who clean an entire room hours ahead instead of panel by panel right before install.
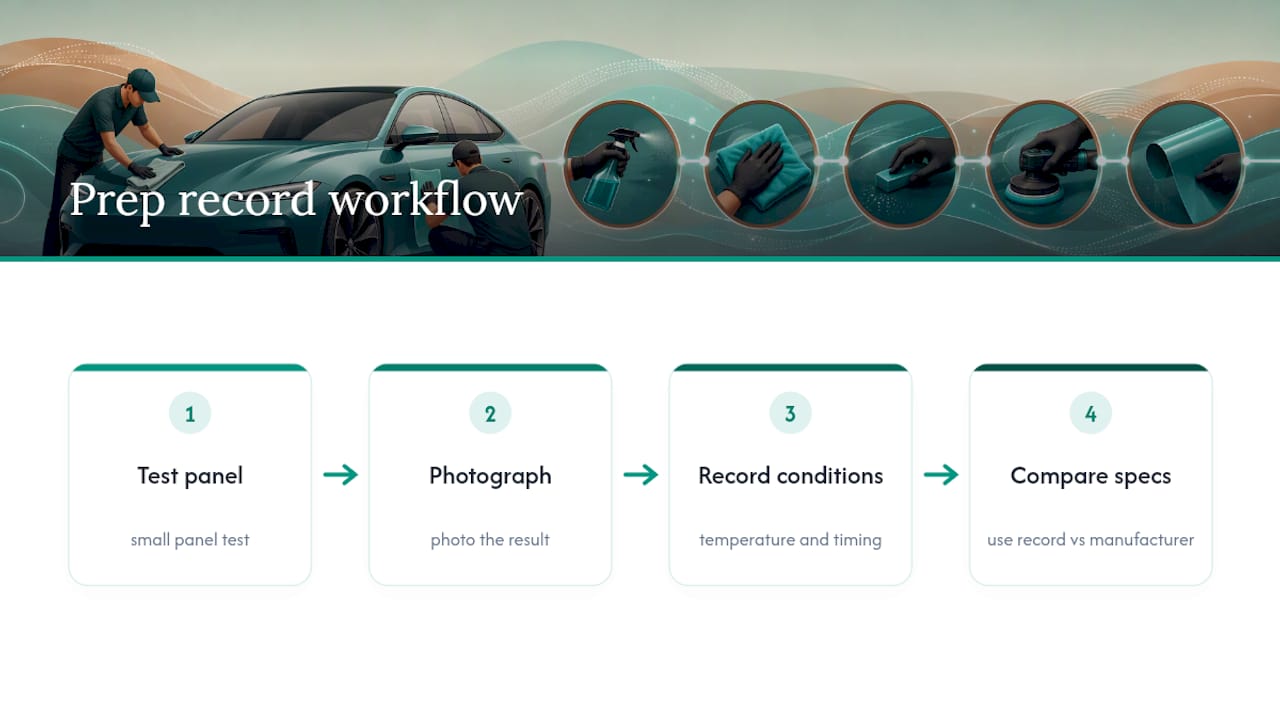
The habit worth building: test a small panel, photograph the result, and keep a short record of temperature and timing. When something goes wrong six weeks later, that record tells you whether it was prep or product. Following manufacturer specs isn’t a formality. It’s the fastest way to skip the guesswork on your next job.
A Primer-and-Film System Built for Predictable Results
Matching a primer to the film you’re installing removes a lot of the guesswork that comes from testing random products against an unfamiliar substrate. Bodaq’s system pairs a purpose-built primer with its own film line, so the adhesion numbers you see on a test patch are the numbers you should expect across the whole job, not a lucky result on one panel.
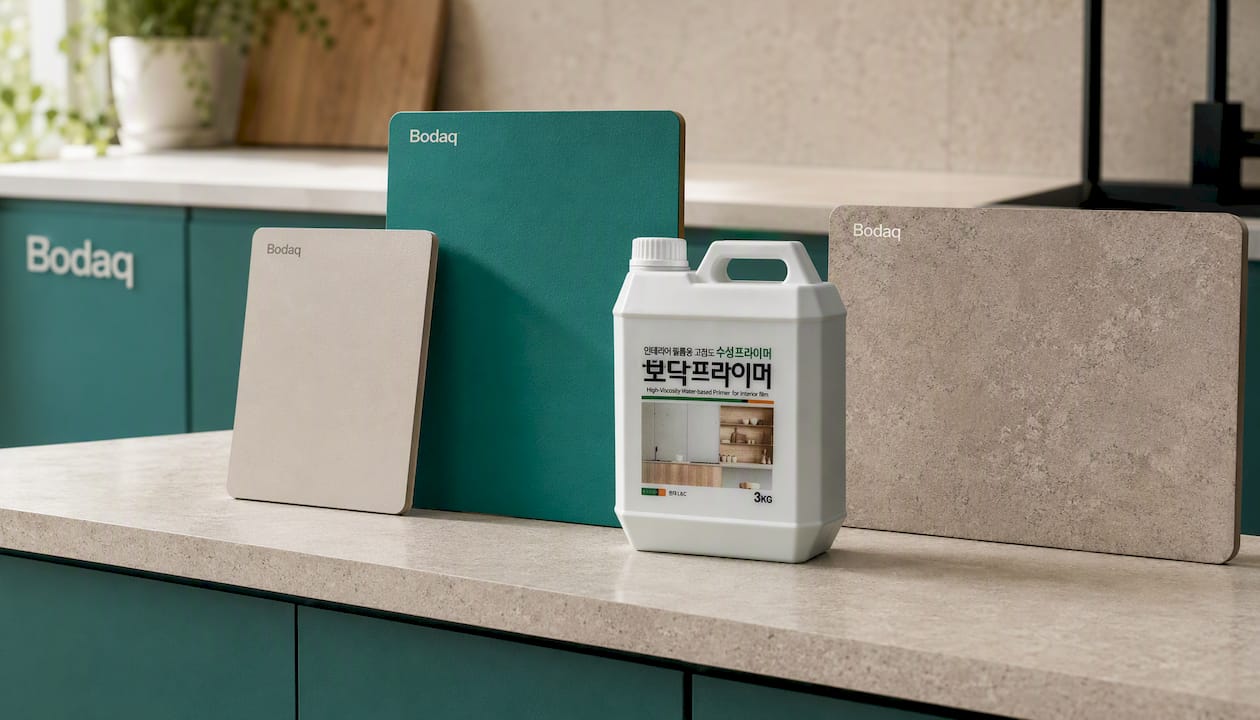
If you’re prepping a porous or textured wall, Bodaq Water-Based Primer (3 KG) is built to work with the film line rather than as a generic add-on. For smooth interior surfaces, Easy Clean ECF01 is a straightforward starting point, and Rustic Stone EXF52 shows how a textured, stone-look finish performs once the prep steps above are followed correctly. Request a sample of any of these to test adhesion on your own project surface before ordering a full roll, or reach out about installer training if you’re taking on more complex jobs regularly.
Sources
These are the primary sources behind the cleaning sequence, IPA ratio, and substrate guidance covered above.
- Surface Preparation for Film and Coating Deposition Processes (Handbook chapter)
- Substrate Cleaning and Preparation (Avery Dennison Instructional Bulletin #1.10)
- 3M protection wrap films vehicle prep guide
FAQ
What Is Surface Prep, Exactly?
Surface prep is the cleaning and treatment process that turns a contaminated, uneven substrate into one that’s homogeneous and reproducible enough for reliable film adhesion. For film installation, that means detergent washing, degreasing where needed, and a final IPA wipe before the film goes on.
What Is ST2 and ST3 Surface Preparation?
ST2 and ST3 are hand and power tool cleaning grades commonly referenced in industrial coating standards, describing how thoroughly loose scale, rust, and contamination are removed from a metal surface before a coating or finish is applied. They’re not specific to architectural film, but the underlying goal, a clean and stable substrate, is the same principle this article’s cleaning sequence follows.
What Chemicals Are Used to Prep a Surface for Film?
A neutral detergent handles general dirt, a solvent degreaser like VM&P naphtha addresses oils and waxes, and a 70/30 isopropyl alcohol and water mix is the standard final wipe immediately before installation. Ammonia-based cleaners should never be part of this sequence since they can damage pressure-sensitive adhesives.
What Are the SSPC Surface Preparation Standards?
The SSPC (Society for Protective Coatings) publishes surface preparation standards mainly for industrial and marine coatings on steel, covering cleanliness levels achieved through blasting, hand tools, or power tools. Architectural and decorative film installers generally follow manufacturer-specific bulletins from companies like Avery Dennison and 3M instead, since those are written for the substrates and adhesives actually used in film work.
How Long Can You Wait Between Cleaning and Installing Film?
Install as close to immediately after the final IPA wipe as possible. Waiting even a few hours gives dust, humidity, and airborne oils time to resettle on a surface that was clean moments earlier.