A bathroom vanity wrap is a thin, self-adhesive architectural film applied over an existing vanity, so the cabinet gets a new wood grain, stone look, metal finish or solid color without demolition, a spray booth or a week of downtime. The film does the visual work. The result depends on three things: a sound surface underneath, a careful install, and sealed edges wherever steam and splashes reach. Bodaq Interior Film is a stretchable, self-adhesive film with air-channeled adhesive, made to make that install cleaner, and it comes in over 450 textures and colors.
TL;DR
- A vanity wrap works best on flat, sound, clean surfaces: laminate, thermofoil, sealed painted wood and cabinet doors and sides.
- Prep decides the outcome. Degrease, dry, wipe with alcohol, fix chips and remove hardware before the film touches the surface.
- Bathrooms are humid, so seal edges and seams, and wipe standing water around the sink.
- Choose film made for architectural interiors rather than generic contact paper, then confirm the finish and sample before you commit to a full vanity.
- Designers, property managers and hospitality teams use wraps to refresh many units quickly, with far less disruption than replacement.
Table of Contents
- What a bathroom vanity wrap actually is
- Which vanity surfaces take a wrap well
- Why the film you choose matters in a bathroom
- How to wrap a bathroom vanity, step by step
- Making a wrap last in a humid room
- How long does a vanity wrap last?
- Wrap, refinish or replace: how the costs compare
- Choosing a finish that suits the room
- Where a vanity wrap fits in a larger project
- Bodaq for your vanity project
- Our perspective
- FAQ
- Sources
What a bathroom vanity wrap actually is
Think of a vanity wrap as a tailored garment for a cabinet. The structure stays, the surface changes. A film with a printed or textured decorative layer and a pressure-sensitive adhesive is smoothed over the doors, drawer fronts, side panels and, where the surface allows, the top. Because the cabinet box is untouched, the plumbing, the sink and the countertop footprint stay exactly as they are.
That is why the approach appeals to such different people:
- Homeowners get a new look for a fraction of the disruption of replacing a vanity.
- Interior designers and architects can specify a consistent wood, stone or solid color across vanities, millwork and walls.
- Property managers can refresh tired units between tenants without taking a bathroom out of service for long.
- Hospitality teams can update guest bathrooms room by room, rather than closing floors.
It is a surface solution, not a structural repair. A vanity with a swollen base, active leaks or crumbling panels needs that problem fixed first. A wrap covers a finish, it does not hold a cabinet together.
Which vanity surfaces take a wrap well
Film bonds to what is underneath it, so the substrate matters more than the pattern you choose. As a rule of thumb, candidates include laminate in good condition, smooth glossy cultured marble, flat doors and sides, and clean, non-peeling thermofoil or painted wood. Raw porous wood, cracked tile, flaking paint and heavy texture are the surfaces to avoid or correct first, unless you are using a thick architectural film designed to bridge texture.
Here is a quick way to read your vanity:
| Surface | Good candidate? | What to do first |
|---|---|---|
| Laminate, intact | Yes | Clean, degrease, sand raised chips |
| Thermofoil, not peeling | Yes | Clean well; re-glue or replace any lifting areas |
| Painted wood, sound | Yes | Remove loose paint, sand smooth, clean |
| Cultured marble, glossy | Yes | Degrease and dry thoroughly |
| Flaking paint or peeling veneer | Not yet | Strip and repair, then reassess |
| Raw or porous wood | Not yet | Seal and smooth the surface first |
| Deep routed or heavily textured panels | Depends | Use a film suited to textured substrates, and test a small area |
Flat doors and side panels are the easiest wins. Raised-panel doors, deep profiles and tight inside corners take more patience, which is where a film that stretches smoothly pays off.
A note on the countertop
The top is the hardest-working part of a vanity. It meets standing water, soap, hair products and hot tools. Wrapping a top is possible on a sound, smooth surface, but it needs the most careful edge sealing and the most disciplined daily habits. If you want the lowest-risk, highest-impact change, wrap the doors, drawer fronts and visible sides first, and treat the top as a second decision.
Why the film you choose matters in a bathroom
Bathrooms put steam, temperature swings and splashing water on every surface. Generic craft-store contact paper is thin and made for light use. Architectural interior film is built for walls, doors, furniture and other interior surfaces in residential and commercial spaces, and it is designed to handle daily wear.
What this means for a vanity:
- Stretch and conformability. A stretchable film follows curves, edges and corners with less creasing. Bodaq’s film is stretchable by design, which is useful at door edges and rounded profiles.
- Air-channeled adhesive. Bodaq’s adhesive includes air channels, which helps release trapped air as you smooth the film down, so bubbles are easier to chase out.
- Range of looks. With over 450 textures and colors across wood, metal, stone and marble, solid color, and fabric and leather collections, you can match a vanity to flooring, walls or a brand palette.
- Durability for busy spaces. We design Bodaq for high-traffic interiors, which is exactly the environment of hotel bathrooms and multi-unit housing.
A useful point from the wider materials conversation: one comparison notes that PVC tolerates humidity but can trap moisture at seams unless edges are sealed and the substrate is properly primed. The takeaway is the same whichever film you use: in a wet room, edge sealing and substrate prep are as important as the surface finish.
How to wrap a bathroom vanity, step by step
This is the full routine. Allow a calm afternoon for a standard single vanity, more for a double or one with many drawers.
1. Measure and order with margin
Measure each door, drawer front and panel you plan to wrap, then add margin on every side. One U.S. guide suggests cutting vinyl with a 2-inch margin, which gives you room to wrap edges and trim cleanly. Order a little extra for mistakes and for the pieces that wrap around an edge. Requesting a sample of your chosen finish first lets you see the color in your bathroom’s actual light.
Where it goes wrong: measuring the visible face only, then running short on edge wraps.
2. Remove what you can
Take off doors, drawers, pulls and hinges. Wrapping a flat door on a bench is much easier than working vertically in a cramped room, and film that tucks behind the edge holds better than film cut around hardware.
Where it goes wrong: leaving hardware in place and cutting around it, which leaves ragged edges that lift first.
3. Clean, degrease and dry
Bathroom vanities carry soap scum, hair product residue and skin oils that you cannot always see. Guides for this job agree on the sequence: scrub with a strong degreaser, then wipe with 91% isopropyl alcohol and a lint-free cloth. Let everything dry completely.
Where it goes wrong: wrapping over damp or greasy spots. The adhesive bonds to the residue, not the cabinet, and the film lifts later.
4. Repair and smooth the surface
Fill dents, lightly sand raised chips and re-glue loose laminate. Film is thin enough to telegraph what lies beneath it, so a chip that feels small under your thumb will show as a ridge under a glossy finish. Deal with any active moisture problem now: a slow leak under the sink will undo the best wrap.
5. Cut, position and anchor
Cut each piece oversized. Peel back a few inches of backing, align the film, and anchor it along one edge. Work with the liner partly on so you control how much adhesive meets the surface at a time. Starting at the center of a large panel and moving outward keeps the film flat.
6. Squeegee in sections
Smooth with a felt-edged squeegee, using firm, overlapping strokes from the center out. Air-channeled adhesive lets trapped air move toward the edges, so keep your strokes steady rather than pressing down hard in one spot. Apply the film in sections, and lift and re-lay a section if a bubble forms early instead of working it flat.
Where it goes wrong: stretching the film tight across a large flat area. Stretch is for corners and curves, and over-stretched film tends to pull back over time.
7. Heat edges and corners gently
Use low heat at edges and corners to relax the film so it conforms. Overheating can distort the film or damage the finish, and guides caution against both overheating and overstretching. Press the film into the edge firmly as it cools.
8. Trim, wrap the edges and seal
Trim with a sharp blade, replacing it often. Wrap the film around the edge and onto the back of the door where you can, so the cut edge faces away from splashes. Then seal where water finds its way in: along the backsplash line, around the sink cutout and at the front edge of a wrapped top. A thin bead of clear silicone sealant along edges where vinyl meets a wall, floor or sink helps block steam and splashing water. Drop-in sinks are usually the easiest to wrap around, because the rim can cover the film edge, while undermount sinks are harder.
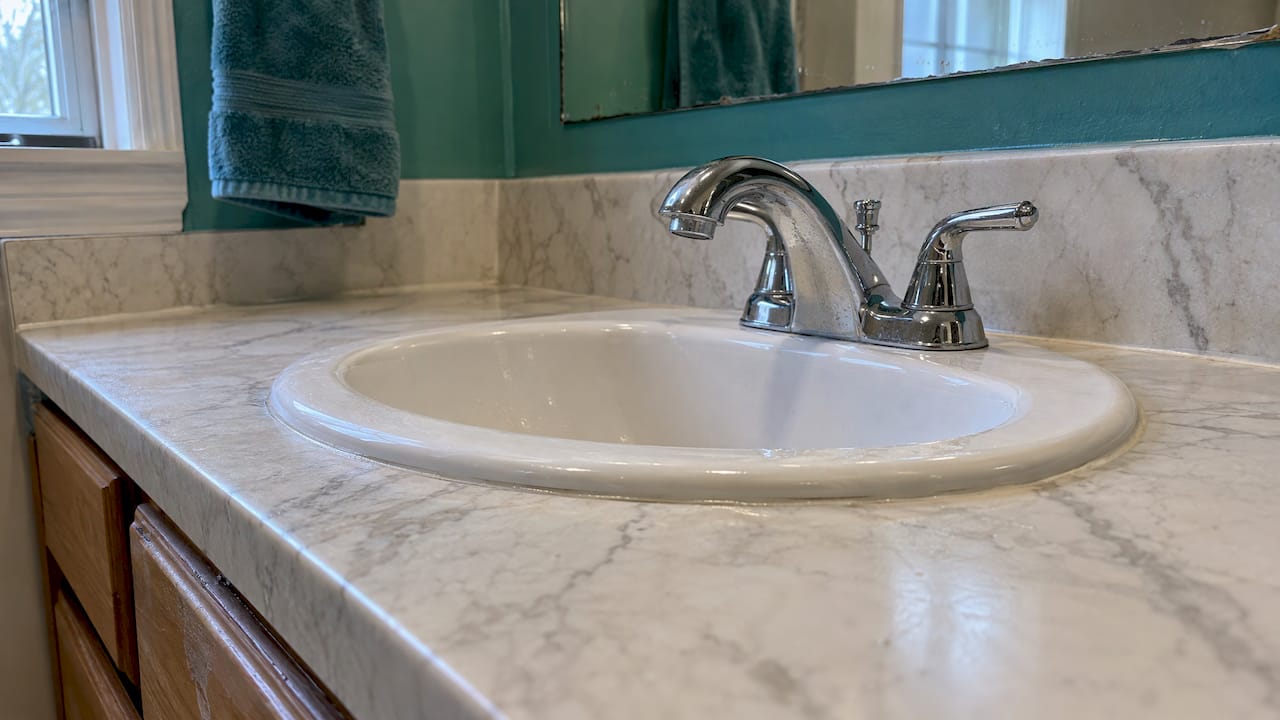
9. Rehang and let it settle
Reinstall doors and hardware. Give the film a day or so before heavy use or aggressive cleaning, so the adhesive can settle fully.
Making a wrap last in a humid room
Seams and edges are where a wrap succeeds or fails. Water that seeps under the edges weakens the adhesive and leads to peeling and bubbling, so two habits matter most: sealing edges with clear caulk and wiping up standing water right away, especially around the sink.
Some professionals go a step further on doors and apply an adhesion promoter to the edge and back-side perimeter before the final wrap. One pro-method guide describes this edge primer plus silicone approach as the physical barrier that keeps moisture from reaching the adhesive. For a commercial installation, that kind of edge discipline is worth building into the specification.
Cleaning a wrapped vanity
Keep it simple. Gentle soap and water with a soft cloth handles daily cleaning. Skip abrasive powders and pads, acetone and nail polish remover, and go easy on bleach and ammonia. Wipe the counter and sink rim dry after use. For hospitality housekeeping, write these rules into the cleaning checklist so a harsh product never reaches the film.
How long does a vanity wrap last?
Honest numbers depend on the film, the prep and the room. Published ranges for ordinary contact paper are modest: about 1 to 3 years is typical, with low-use bathroom vanities sometimes looking good for 3 years or more. A retail review reports that vinyl rated for kitchens and bathrooms outlasts generic contact paper by years. That is a good argument for choosing a purpose-built architectural film over a roll from the stationery aisle, and for putting your effort into edges and prep.
The variables that move the number most:
- Use. A guest bath used lightly lasts differently than a family bath with daily showers beside the vanity.
- Ventilation. A working exhaust fan reduces how much steam settles on the edges.
- Edge sealing. Sealed edges keep water away from the adhesive.
- Surface quality. A sound, clean substrate holds the film more securely.
Wrap, refinish or replace: how the costs compare
A wrap is not the only way to change a vanity, so it helps to see where it sits. Typical U.S. figures for refinishing a bathroom countertop in place run from $500 to $1,500 for a typical 10 square foot vanity job, depending on materials and edge treatment. Replacement adds the cost of the new unit, plumbing disconnection and reconnection, and disposal of the old one.
A wrap is different in kind. Film is a dry, cut-and-apply process, so there is no curing time, no fumes to ventilate, and no need to take the room out of service for days. Prices for Bodaq film are provided on request through the order or quotation process, since they vary with the collection and project size.
For multi-unit work, the saving is as much about time as money. A crew that can finish a vanity in a day and move to the next room keeps units in service. That is the practical meaning of refreshing a space without disruption or downtime.
Choosing a finish that suits the room
A small bathroom rewards confident choices. A few approaches we see designers reach for:
- Warm wood grain for a spa-like, organic feel, especially against white tile.
- Stone and marble looks for a sculptural, high-end read on a vanity front or a surround.
- Deep solid colors for the color-drenched effect, a cocooning look where cabinet and wall share a tone.
- Metal finishes for a bold, modern accent on a drawer bank or a niche.
- Soft solid neutrals, such as the Valen Cream or Valen Porcelain solid colors, for a clean, quiet vanity that lets fixtures lead.
Pro tip: look at samples in the room, in morning and evening light, with the actual tile and fixtures beside them. Glossy finishes show every wave in the substrate, while matte and textured finishes are more forgiving on a vanity that has seen years of use.
For ideas on where film works across a project, see where architectural vinyl is most commonly applied.
Where a vanity wrap fits in a larger project
The same film that covers a vanity can carry a look across the space. Matching a vanity to a door, a niche or a wall panel makes a bathroom read as one composed room rather than a collection of parts. Architects and designers use this to keep a consistent brand look across guest rooms, clinics or multi-family buildings, and construction teams like that one product family covers several surfaces.
Bodaq for your vanity project
If you are planning a vanity refresh, or a series of them, Bodaq Interior Film gives you a stretchable, self-adhesive film with air-channeled adhesive and over 450 textures and colors to choose from, in wood, metal, stone and marble, solid color and fabric and leather collections. We also offer installation tools, samples, and certified training for professional installers.
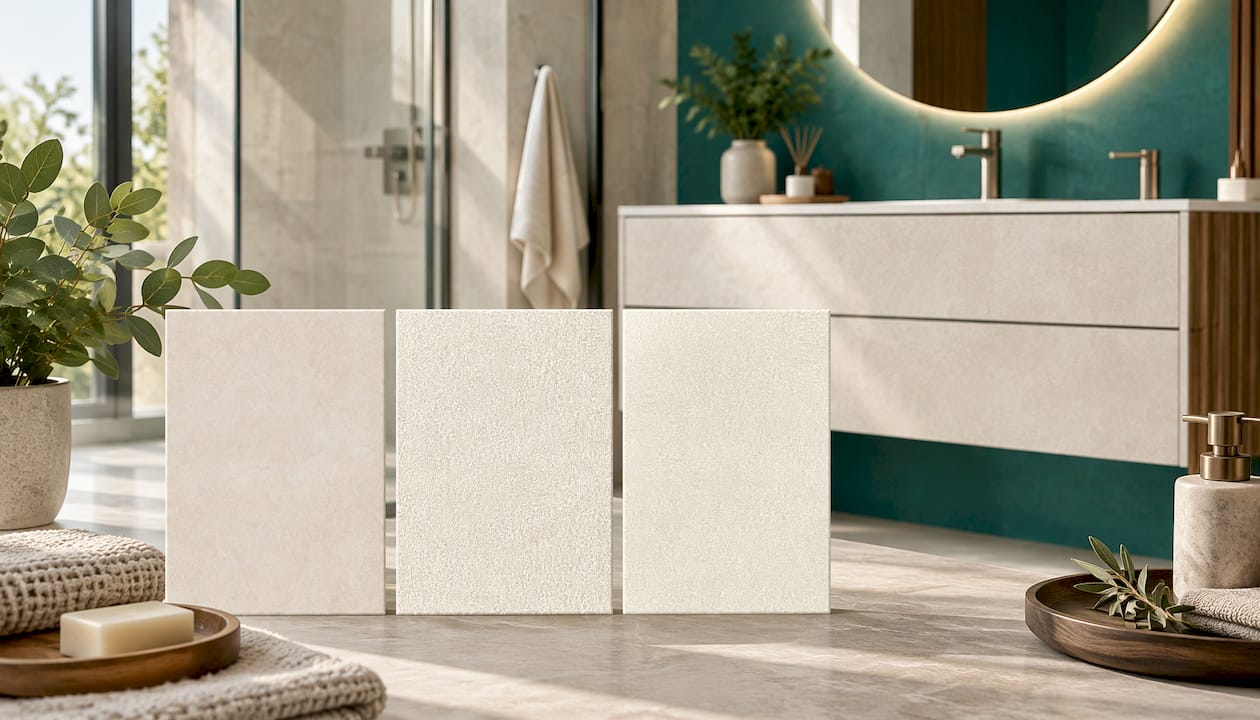
Browse the Bodaq collections to find your finish, or start at the Bodaq Interior Film page to request samples and order for your project.
Our perspective
We think of a vanity as the most visible piece of furniture in a bathroom, and the one that is most often replaced when it only needs a new surface. A wrap lets the cabinet you already own carry a completely new look.
Our film is stretchable and self-adhesive, and its adhesive is air-channeled, because those are the details that decide how an install feels in the hands of whoever is doing it. Smoother handling at the corners and edges, and fewer fights with trapped air, mean a cleaner result and less waste.
The catalog matters too. With over 450 textures and colors, a designer can match a vanity to the rest of a project, and a property manager can keep many units consistent. We design Bodaq for durable, high-traffic interiors and build it to meet eco-friendly standards, so a refresh can be a responsible choice as well as a quick one.
Our advice is simple: prepare the surface properly, seal the edges where water meets the film, and choose a finish you will still love in the morning light. Do those three things and a wrapped vanity looks like it was always meant to be there.
Bodaq
FAQ
Can you wrap a bathroom vanity?
Yes, if the surface is sound. Laminate, thermofoil, sealed painted wood and smooth cultured marble are good candidates, while flaking paint, cracked surfaces and raw porous wood need repair first. Doors, drawer fronts and sides are the simplest areas to wrap.
How long does a vanity wrap last?
It varies with film quality, prep, ventilation and use. Published guidance on ordinary contact paper puts typical life at roughly 1 to 3 years, and bathroom-rated vinyl is reported to outlast generic paper by years. Sealed edges and prompt wiping of standing water are the habits that matter most.
Is vanity wrap waterproof?
Treat it as water-resistant at the surface and protect the edges. Most vinyl films resist splashes, and the weak points are seams, edges and the area around the sink. Sealing those areas with clear silicone and wiping standing water is the standard way to keep moisture away from the adhesive.
How do you clean a wrapped vanity?
Use mild soap and water with a soft cloth, and dry the surface afterward. Avoid abrasive pads and powders, acetone and nail polish remover, and strong bleach or ammonia, which can dull or damage the film’s finish.
Do I need a professional installer?
A single flat-front vanity is a manageable project for a careful homeowner. For hotels, multi-unit buildings and complex profiles, certified installers work faster and more consistently, and Bodaq offers certified training for professional installers.
Sources
- Wrap a Bathroom Vanity With Contact Paper
- How to Vinyl Wrap a Bathroom Vanity
- PVC vs PET Overlays: Best for Kitchens and Bathrooms
- Contact Paper for Countertops: Application and Review
- Rental Friendly Bath Vanities Under $300
- Bathroom Countertop Refinishing: Costs, Process and FAQs