
You can get a smooth, tight wrap on most curved surfaces by prepping the substrate, choosing a conformable film, controlling heat and stretch, and using relief cuts or inlays where the geometry demands them. Single-axis curves like cylinders and tumblers usually take one piece cleanly. Compound curves and domes often need staged heat, pre-forming, or a planned seam. Start by cleaning the surface, gathering a heat gun and quality squeegee, and choosing a cast or stretchable film built for curves.
TL;DR:
- Cast films outperform calendared vinyl on complex curves due to better stretchability and adhesion during temperature changes.
- Proper surface preparation includes cleaning with isopropyl alcohol, using the right tools, and working at room temperature to ensure a smooth application.
- Single-axis curves are best handled with the hinge method, allowing dry, flexible application that can be easily adjusted for wrinkles or bubbles.
- Compound and deep curves require staged heat, pre-forming on a mold, and post-heating to lock the film into complex shapes.
- Planning seams, relief cuts, and inlays along natural lines and stress directions improves coverage and creates intentional design elements rather than repairs.
Table of Contents
- Essential tools, film types, and step-by-step surface prep
- The hinge method for cylinders and gently curved panels
- Heat stretching and pre-forming for compound curves
- Relief cuts, seams, and inlays: planned geometry, not failure
- Handling recesses, rivets, and deep contours
- Fixing bubbles, wrinkles, edge lift, and stubborn memory
- Why stretchable, air-channeled film cuts down on rework
- What separates a good wrap from a great one
- Try Bodaq: request samples or installer support
- Sources
- FAQ
Essential tools, film types, and step-by-step surface prep
Cast vinyl and purpose-built stretchable architectural films outperform calendared vinyl on anything but a flat panel, since cast films stretch and conform with far less distortion and hold adhesion through repeated temperature swings, while budget calendared films tend to wrinkle on compound shapes. That distinction decides whether a wrap looks sculptural or looks patched.
Before any film touches the surface, gather the right toolkit and run a clean prep sequence.
- Heat gun: relaxes film memory and softens adhesive for stretch and repositioning.
- Felt and soft squeegees: push out air without scoring the film’s surface.
- Sharp blades or a hook knife: trim clean edges and execute relief cuts.
- Transfer tape and adhesion primer: stabilize patterned films and boost grip on porous or metal substrates.
- 70% isopropyl alcohol and a lint-free cloth: strip oils, dust, and residue before the film ever unrolls.
Work in a space around room temperature, check for dust in raking light, and keep patterned rolls oriented the same direction across a project so grain and texture line up. Consistency across batches matters more on curved furniture pieces than on flat panels, where any mismatch is far more visible.
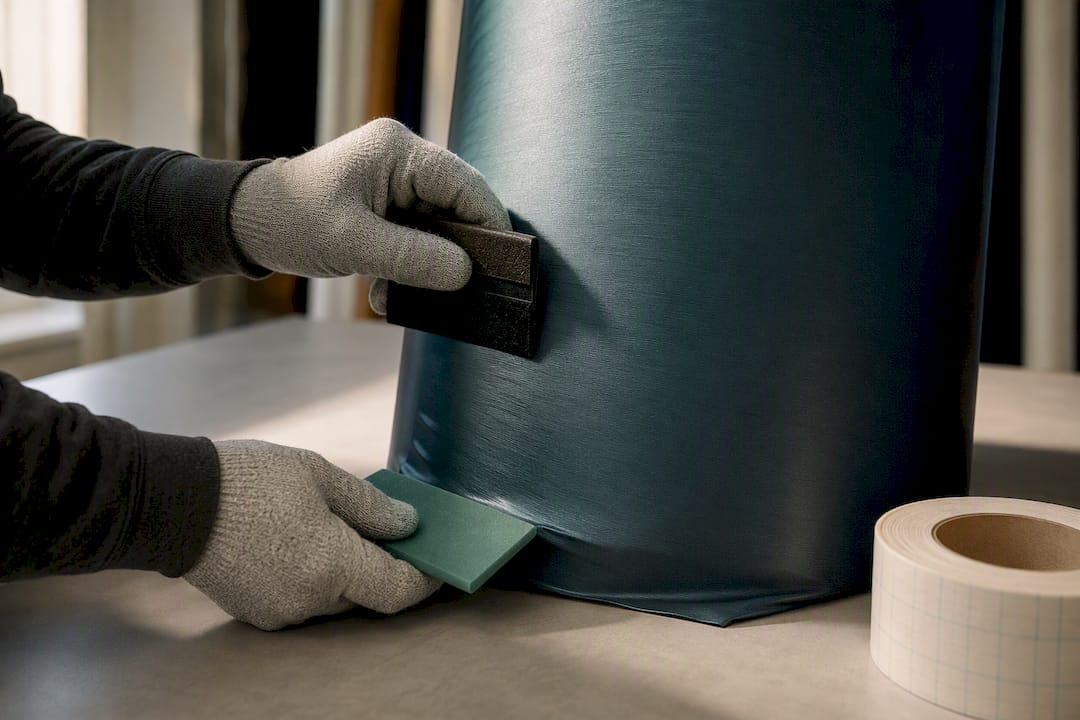
The hinge method for cylinders and gently curved panels
Single-axis curves, think tumblers, rails, and gently bowed cabinet fronts, respond well to a dry application called the hinge method.
- Position the film over the object and tape one edge down as a hinge.
- Fold the hinge back, peel a few inches of liner, and lay the film’s leading edge along your reference line.
- Squeegee from the center outward in overlapping strokes, working air toward the edges rather than trapping it.
- Peel the transfer tape slowly at a low angle rather than lifting it straight up.
- Burnish every edge, then apply light post-heat to seal the perimeter.
Dry application on a single-axis curve gives you time. If a bubble or wrinkle shows up, you can usually lift and reset before the adhesive grabs fully.
Pro Tip: Use a firm felt squeegee for the initial lay and switch to a softer one for final burnishing, and always pull transfer tape back over itself rather than away from the surface to avoid stretching the film unevenly.
Heat stretching and pre-forming for compound curves
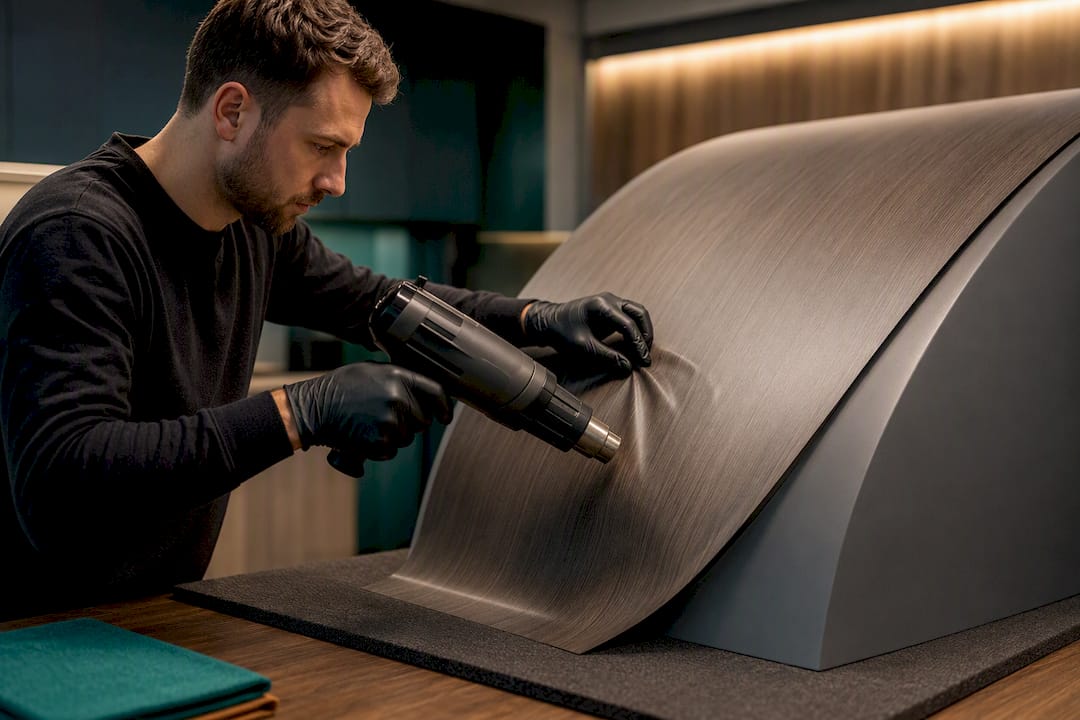
Compound curves, domes, and anything curving in two directions at once put multi-directional stress on a flat sheet, and heat is what temporarily relaxes that resistance so the film can conform. The workflow that installers rely on: pre-warm the panel and the film together, apply broad even heat rather than a hot spot, stretch gently while squeegeeing from the center, then post-heat to lock the new shape into the film’s memory.
- Pre-warm both surface and film before any stretching begins.
- Move the heat gun in slow, wide passes instead of holding it still.
- Stretch incrementally, checking for even coverage before pulling further.
- Post-heat the finished section to reset memory and reduce edge lift weeks later.
For deep domes, pre-form the film on a practice mold first, then reapply the shaped section to the real surface rather than stretching cold. Large panels sometimes call for a wet application: a light mix of water and a drop of mild soap lets you float the film into position before squeegeeing the solution out through relief points.
Manufacturer bulletins for cast facade films recommend post-heating in the range of 104 to 122 degrees Fahrenheit to re-cast the film in its new shape, a detail worth following closely since going hotter risks scorching the surface print.
Relief cuts, seams, and inlays: planned geometry, not failure
A flat sheet cannot perfectly cover a surface with nonzero Gaussian curvature, and computational wrapping research confirms that developable nets or planned seams are the reliable way to approximate tight coverage once a shape curves in more than one direction at once. That is not a workaround, it is the geometry itself telling you where a single piece runs out of room.
- Plan seams along natural body lines, shadow gaps, or trim edges where the eye already expects a break.
- Angle relief cuts along the direction of stress rather than straight across it.
- Space cuts just far enough apart to release tension without leaving visible gaps.
- Use inlays where a recess or ridge is too sharp for a continuous stretch.
Placed correctly, seams and inlays read as intentional design lines rather than repairs, and installer guidance treats them as an engineering choice made before the film ever goes on, not a fallback after a wrap fails.
Pro Tip: Cut relief lines slightly shorter than you think you need. It’s easier to extend a cut than to camouflage one that ran too far.
Handling recesses, rivets, and deep contours
Mirrors, handles, rivets, and vents fail more often than open curves because heat and stretch have less room to distribute evenly.
- Heat the recessed pocket in stages, working the film in gradually rather than forcing it into the deepest point first.
- Switch to a small riveting brush or soft-tip squeegee to push film around fasteners without puncturing it.
- Apply an adhesion primer on porous or textured recesses where standard adhesive won’t grip fully.
- Add edge-seal tape along any cut edge near moisture exposure, like vents or exterior handles.
- Let the section cool fully, then run a fingertip inspection for lifted edges, trapped air, or thin spots before calling it finished.
Rework around these details is common even for experienced installers, so treat the cooling inspection as a required step, not an optional one.
Fixing bubbles, wrinkles, edge lift, and stubborn memory
Most problems trace back to one of four causes: surface contamination, film memory fighting the new shape, insufficient heat during stretch, or over-stretching past the film’s safe range.
- Small bubbles: reheat lightly and burnish from the center out.
- Persistent bubbles: micro-perforate with a pin and press flat, then seal with a touch of heat.
- Wrinkles from memory: reheat the whole section evenly rather than spot-heating one wrinkle.
- Edge lift: cut back to clean material and reset with fresh adhesive rather than gluing over a lifted edge.
A small bubble or soft wrinkle is worth repairing. Deep creases, torn relief cuts, or scorched film call for replacing that section rather than patching it, since a patch job usually shows under raking light. Check the wrap again after the first heat and cold cycle, generally within 72 hours, since that is when marginal edges tend to announce themselves.
Why stretchable, air-channeled film cuts down on rework
Architectural interior film built to stretch further than standard vinyl with air-channeled adhesive lets trapped air escape during application, which directly addresses the bubbling and edge-lift problems installers face on curved work.
- Stretchability reduces the need for aggressive heat on moderate compound curves.
- Air-channeled adhesive gives a wider margin for error during the squeegee pass.
- A wide range of textures and colors means a wood, stone, or solid finish is available for many curved applications.
For readers ready to move from technique to material, the step-by-step installation guide walks through the same staged approach covered above using Bodaq film specifically, and the collections overview is a useful starting point for matching texture to project.
What separates a good wrap from a great one
The biggest gap between hobby wraps and professional ones isn’t heat gun skill, its geometric planning done before the film ever unrolls. Installers who map seam placement and relief cuts against the actual curvature of a piece almost always outperform installers who start stretching and improvise seams only after a wrinkle forces their hand.
Conventional advice leans hard on heat as the fix for everything, but heat only buys you flexibility. It doesn’t solve a shape that genuinely can’t be covered by one flat piece. The instinct to hide a seam is often wrong. A seam placed along a natural line reads as intentional, while one hidden badly reads as a mistake twice.
If you take one thing from this playbook, prioritize matching your technique to the curve’s actual geometry before you touch a heat gun. Single-axis curves reward patience with dry application. Compound curves reward staged heat and pre-forming. Extreme geometry rewards planning a seam early rather than discovering you need one halfway through a stretch.
— Bodaq
Try Bodaq: request samples or installer support
Bodaq’s stretchable film and air-channeled adhesive were built for exactly the curved-surface problems covered above, giving you a wider margin during heat stretching and fewer bubbles to chase afterward.

- Browse the Wood Collection for curved furniture and paneling projects.
- Request a sample from the interior film collections page before committing to a full roll.
- Visit Us to order film or ask about installer training.
Sources
These technical sources back the geometric and heat-range guidance above: computational wrapping research on developable nets and curvature limits, advanced wrap technique guidance on tension and inlays, installer comparisons of cast versus calendared vinyl, a hands-on how-to covering hinge and relief-cut methods, and Avery Dennison’s technical bulletin on safe heat ranges.
- Computational wrapping enables conformal covering of curved surfaces
- Advanced Vehicle Wrap Techniques – Complex Curves & Deep Recesses | WrapSize
- How wrap installers handle complex vehicle lines and curves – Wrap Guys
- TB 3.21 Application instructions for Avery Dennison Facade Film
FAQ
How do you vinyl wrap a curved surface?
Clean the surface thoroughly, choose a cast or stretchable film, and apply the hinge method for gentle curves or heat stretching for compound shapes. Use relief cuts or a planned seam when the curve changes direction sharply enough that one flat piece can’t lie smooth, then post-heat every stretched section to set the film’s new shape.
What counts as a curved surface in wrapping work?
A curved surface is anything that isn’t flat, ranging from a simple single-axis curve like a tube or rail to a compound curve like a dome or car fender that bends in two directions at once. The technique changes with the type: single-axis curves usually take one dry-applied piece, while compound curves often need staged heat and sometimes a seam.
How do you wrap a rounded corner cleanly?
Heat the corner evenly rather than focusing on the tightest point, then stretch the film gradually while squeegeeing from the center of the curve outward. If the radius is very tight, a small relief cut placed along the corner’s natural line will release tension without leaving a visible gap.
Can you engrave on a curved surface?
Engraving on a curved surface is possible with equipment designed to hold or rotate the piece during cutting, though it falls outside vinyl wrapping technique and depends on the engraving tool’s own specifications. For film applications specifically, any engraved detail should be masked and worked around during heat stretching rather than wrapped over directly.
What causes bubbles and edge lift after a curved wrap?
Bubbles usually come from trapped air or leftover surface contamination, while edge lift often traces back to insufficient heat during the original stretch or film memory pulling the edge back over time. Reheating and burnishing fixes small bubbles, while lifted edges typically need to be cut back to clean film and resealed.