
Yes. When a door is flat, smooth, and structurally sound, a vinyl architectural film wrap delivers a factory-finish refresh in a single day. DIY installation works well for experienced hobbyists tackling simple flat doors, but complex profiles, high-traffic commercial settings, or warranty-covered projects call for a certified installer. Done right, you get bubble-free coverage, tight trimmed edges, and a door ready to rehang immediately.
TL;DR:
- Vinyl door wraps are best suited for flat, smooth surfaces like painted wood or metal, with poor results on textured or damaged substrates.
- Proper installation involves oversized cuts, center-out application, careful heating, and sealing edges to prevent lifting and lifting issues over time.
- Make sure to remove hardware, clean thoroughly, and test adhesion on low-energy surfaces before applying the film to ensure longevity.
- DIY is feasible only for simple, flat doors in low-traffic areas, while multiple or complex profiles require certified installers to preserve warranty and quality.
Table of Contents
- How Do You Install a Door Wrap Step by Step?
- What Tools and Materials Do You Need?
- Which Doors Are Suitable for a Vinyl Wrap?
- Wrap-Around vs Trimmed Edges: Which Finish Should You Choose?
- How Do You Fix Bubbles, Creases, and Lifting?
- What’s the Realistic Lifespan and Cost of a Door Wrap?
- Why Bodaq Film Simplifies Door Installations
- Should You DIY the Wrap or Hire a Certified Installer?
- Ready to Wrap Your Doors? Start With a Sample
- Sources
- FAQ
How Do You Install a Door Wrap Step by Step?
Professional door wrap installation follows a sequence that rewards patience over speed. Skip a step here and you’ll be fighting bubbles or lifted edges within weeks.
- Cut oversized and hinge it in place. Cut your film with 2 to 3 inches of excess on every side, then tape one edge down with masking tape to create a temporary hinge you can lift and reposition. This single trick, borrowed from sign shop technique, turns a two-person job into something one installer can manage confidently.
- Apply top-down, then bottom. Peel the backing away from the hinge point and lay the top half first, smoothing as you go. Fold the film back over the hinge and repeat for the bottom section.
- Squeegee from the center outward. Use a felt-wrapped squeegee in overlapping strokes moving from the middle toward each edge, working in small zones rather than trying to conquer the whole door at once. If a crease forms, re-lift that section and reapply rather than pushing through it.
- Heat and stretch with control. A low-temp heat gun softens the film so it conforms around curves or profiled panels without tearing. Keep the gun moving constantly. A stationary heat source will distort wood grain or stone patterns permanently.
- Trim and finish. Cut clean edges with a fresh micro blade, working slowly around hinges, handles, and closers where hardware interrupts the surface.
- Reinstall hardware last. Mount hinges and handles only after the film has fully set, so screws bite into film-covered substrate cleanly rather than tearing the edge.
Professional installers commonly cut film oversized and work center-out as standard practice, and an experienced hand can wrap a standard commercial door in about half an hour to three quarters of an hour once the rhythm is dialed in.
What Tools and Materials Do You Need?
The right tool kit separates a professional finish from a frustrating afternoon. Here’s what belongs on your bench before you start:
- A felt-wrapped squeegee, which prevents scratching while pressing air channels flat
- A low-temperature heat gun for conforming film around edges and light curves
- A sharp micro blade or box cutter with replacement blades on hand
- Masking tape for the hinge method and temporary positioning
- An edge roller for sealing down trimmed borders
- Isopropyl alcohol for cleaning and running adhesion tests, plus an adhesion promoter for low-energy surfaces like certain laminates
Film selection matters just as much as tooling. Bodaq’s tools guide for interior film installation walks through matching blade type and heat settings to specific film weights, which spares beginners a lot of trial and error.
Which Doors Are Suitable for a Vinyl Wrap?
Flat, smooth substrates are the sweet spot: painted wood, MDF, HPL laminate, and metal doors all take film well. Heavily textured, warped, or delaminated surfaces are poor candidates and usually need repair or replacement instead.
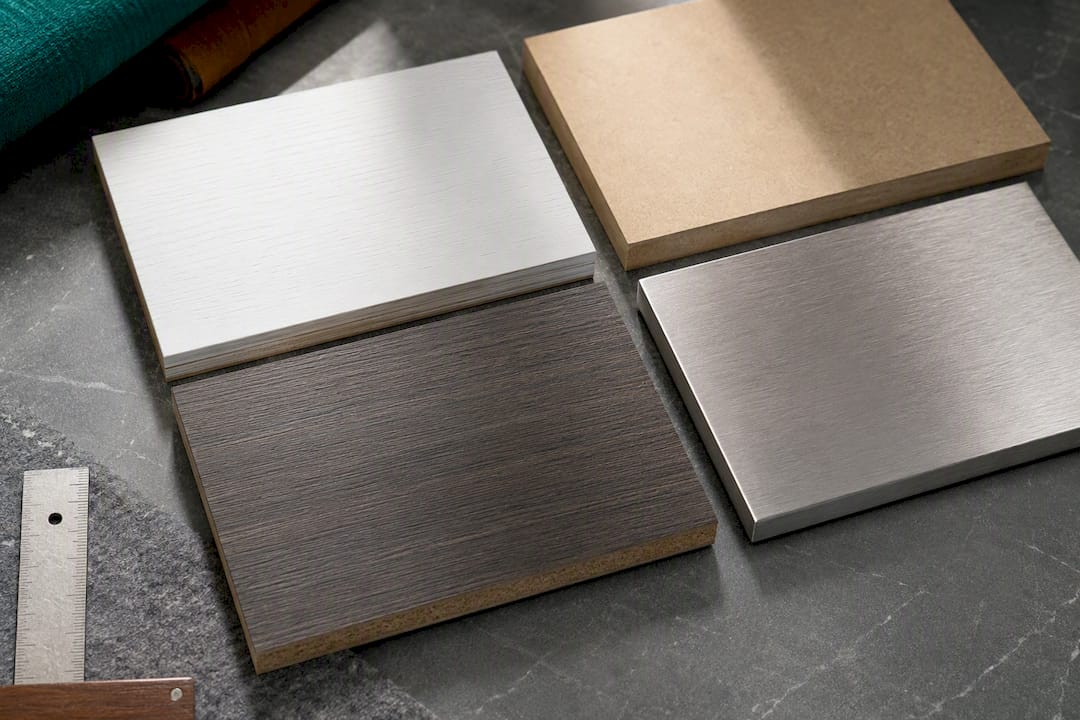
Before committing a full roll, run an adhesion test. Apply a small patch to the surface and check it after 24 to 48 hours, a step industry guides consistently recommend for low-energy or previously coated surfaces where adhesive can struggle to bond.
Prep follows a clear order:
- Remove all hardware, including hinges, handles, and closers
- Degrease thoroughly with isopropyl alcohol to strip oils and residue
- Sand or fill dents, chips, and gouges so they don’t telegraph through the film
- Apply an adhesion promoter over any repaired or glossy spots before wrapping
If a door has structural rot, swelling, or a substrate that won’t hold a patch test, replacement is the more honest answer than forcing a wrap.
Wrap-Around vs Trimmed Edges: Which Finish Should You Choose?
Edge treatment determines how long your wrap resists lifting, and the two dominant methods each solve different problems.
- Wrap-around edges. Heat the film, fold it around the door’s edge, and adhere it to the back face. This method hides the seam entirely and works best when the door has enough edge depth to fold onto, typically a quarter inch or more.
- Trim-and-seal edges. When there’s no room to wrap around, cut the film flush to the edge and seal it with an edge roller. Some installers add a solvent sealer along the cut line for extra insurance in humid environments.
- Cut around hardware with patience. Score lightly around hinge mortises and handle cutouts before removing waste film, rather than trying to cut through in one pass.
- Sequence hardware reinstallation last. Reattach hinges and handles only after edges have fully bonded, usually a few hours after application.
Edges lift over time mainly from moisture intrusion or incomplete adhesive contact, so a firm pass with an edge roller right after installation matters more than most people expect.
How Do You Fix Bubbles, Creases, and Lifting?
Most installation problems trace back to squeegee technique or rushed heating, and nearly all of them are fixable if you catch them early.
- Small bubbles: puncture with a pin, then squeegee the trapped air out toward the puncture point. Air-release adhesive channels make this far easier than working with older film types.
- Creases: apply gentle heat and re-lift the affected section, then reapply while smoothing from the crease outward.
- Lifting edges: reheat the lifted section, press it down firmly with the edge roller, and hold pressure for a few seconds as it cools.
- Pattern distortion: this happens from overstretching, especially on wood-grain or stone-look films. Slow down and let heat do the work instead of pulling harder.
Pro Tip: Keep your heat gun moving in a slow, steady sweep rather than parking it in one spot. Stationary heat is the single most common cause of scorched film and warped patterns.
If a repair attempt fails twice on the same section, stop. Continued heating and reworking can damage both the film and the substrate underneath, and that’s the point to call in a certified installer.
What’s the Realistic Lifespan and Cost of a Door Wrap?
Properly installed architectural film typically lasts several years or longer, though abrasion, standing moisture, and direct heat exposure can shorten that window considerably on high-traffic commercial doors.
Maintenance stays simple:
- Clean with mild detergent and a soft cloth
- Avoid strong solvents or abrasive pads, which can dull the finish or lift edges
- Address spills and scuffs promptly rather than letting grime work into seams
Time and cost: expect 30 to 90 minutes per door depending on complexity, with installed pricing commonly running $150 to $350 per door in trade references, well under full door replacement. Professional installation often preserves manufacturer warranties that DIY work can void, which matters most on large commercial rollouts.
Why Bodaq Film Simplifies Door Installations
Bodaq architectural film is stretchable and self-adhesive, which cuts down on seams and trimmed waste compared to rigid laminates. That flexibility is what lets installers conform film cleanly around door edges and light profiles without fighting the material.
For door projects specifically, a handful of collections stand out:
- Silver Mist (Solid Color Collection S263) and Deep Forest (Solid Color Collection S266) for clean, modern solid finishes
- Terranova MonoBlanc (Premium Collection BLC04) for a high-end neutral look
- Rustic Stone (High-Performance Collection EXF52) and Onyx (High-Performance Collection EXF51) for durability in commercial traffic
- Easy Clean (High-Performance Collection ECF01) for doors that see frequent contact and need low-maintenance upkeep
- W017 Eucalyptus (Natural Wood Collection) for realistic wood grain
- Oatmeal Linen (Natural Surface Collection NF905) for a soft fabric-look texture
Bodaq’s own step-by-step installation guide covers substrate prep and heat-stretch technique in more depth, and certified installer training is available for teams handling multi-door commercial projects.
Should You DIY the Wrap or Hire a Certified Installer?
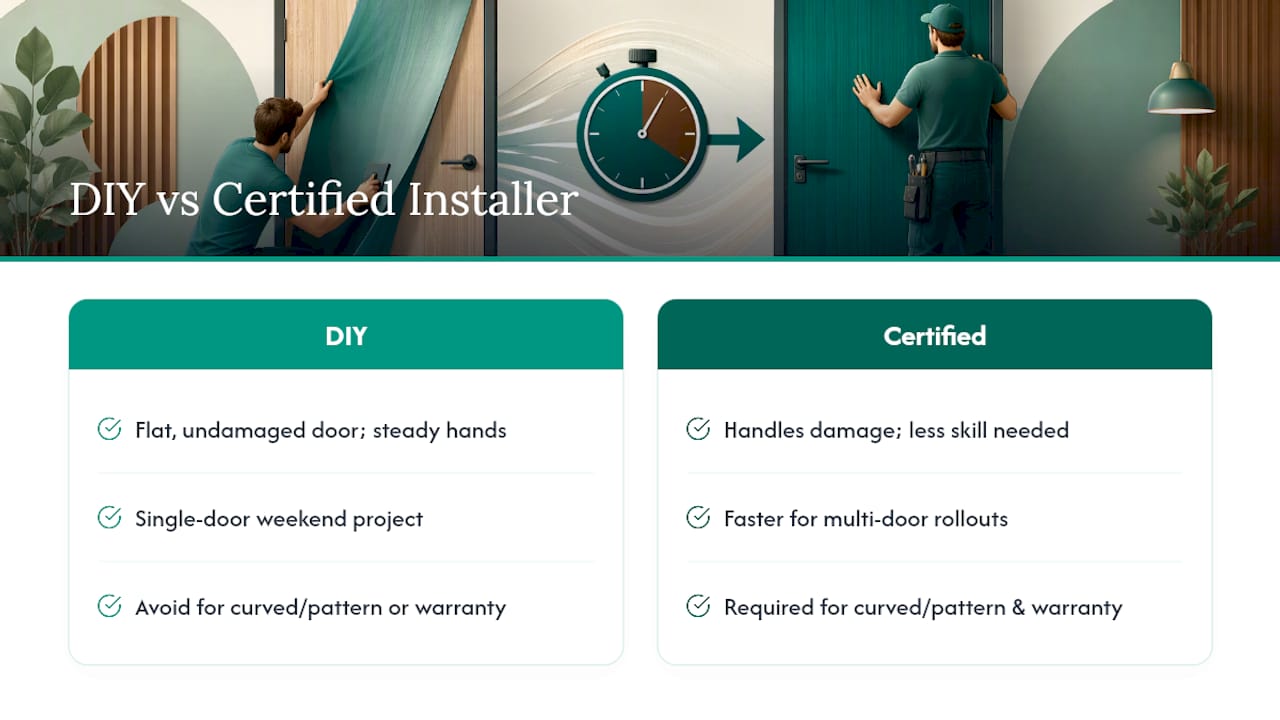
Ask yourself three questions before picking up a squeegee: Is the door flat and free of damage? Do you have steady hands with a heat gun? Is this a single door or a twenty-door commercial rollout?
A single flat door is a reasonable weekend project for a careful DIYer. Multiple doors, curved profiles, or pattern-matched wood grains favor a trained installer who can move faster and avoid costly rework. Warranty-covered projects almost always require professional installation to keep coverage intact.
Ready to Wrap Your Doors? Start With a Sample
Bodaq gives you an alternative to guessing which finish will look right on your doors before you commit a full roll: order a physical sample and hold the actual texture and color against your space first.

Whether you’re refreshing a single office door with Easy Clean for its low-maintenance surface or outfitting a hospitality corridor with Terranova MonoBlanc for a premium look, Bodaq’s collection catalog covers solid colors, stone textures, and wood grains suited to doors of every kind. Renovators managing multiple units can also explore Bodaq’s installer training program to build in-house wrapping capability rather than outsourcing every job. If you’re sourcing film in the United States, check where to buy and how to install Bodaq film near you. Request a sample kit or reach out for a project quote to get your first roll on order.
Sources
- Vinyl Door Wraps: The Complete Guide to Commercial Door Resurfacing – SurfaceSupply
- Door Wrapping — ArmorKitchenWrap
FAQ
How Much Does It Cost to Wrap a Door?
Professionally installed door wraps typically run $150 to $350 per door, depending on film selection and door complexity. Bodaq doesn’t list fixed installation pricing since costs vary by installer and project scope, but current film pricing is available directly on the site.
How Long Does Door Wrapping Last?
Properly installed architectural film typically lasts several years or longer, though abrasion, standing moisture, and direct heat exposure can shorten that window considerably on high-traffic commercial doors.
What Are the Downsides of Vinyl Wrap?
Vinyl wrap only works well on flat, smooth, structurally sound doors. It won’t hide heavy dents, warping, or delamination, and textured or damaged substrates need repair or replacement rather than a wrap.
Can You Remove a Door Wrap Without Damaging the Door?
Yes. Architectural film is designed to be heated and peeled away, and when removed correctly it typically leaves the underlying door surface intact and ready for a new finish.