To wrap a curved surface cleanly, match the technique to the geometry. Gentle, single-direction curves (a column, a rounded counter edge) take a stretchable film applied with light heat and steady squeegee pressure. Compound curves (a dome, a sculpted reception desk) need more heat, more stretch and a careful finish. Whatever the shape, you prep the substrate, work from the center out, and set the film at the end so it stays put.
This guide is for installers, designers, contractors and property teams who want a seamless result on rounded walls, arches, columns, furniture and millwork. We use Bodaq’s stretchable, air-channeled interior film as the reference point, and we are specific about where general vinyl guidance applies and where you should defer to the product’s technical bulletin.
TL;DR
- Identify the curve type first: single-direction (cylinder-like) or compound (bowl-like). It decides how much heat, stretch and relief you need.
- Clean and dry the surface, and fix flaws first. Film follows contours, and that includes dents, seams and dust.
- Anchor the film at a center line, then work outward in sections. Do not pull the whole sheet taut in one go.
- Use heat sparingly to relax the film and stretch it only as far as the film’s spec allows. Then post-heat to set it, especially in recesses and at edges.
- Check the Bodaq technical bulletins for the recommended method and temperatures before you start.
Table of Contents
- Know your curve before you cut anything
- Choose the substrate and film for the job
- The tools that make curves easier
- Step by step: wrapping a curved surface
- Common problems and how to fix them
- Our perspective: why curves are where film earns its keep
- Why film suits occupied commercial spaces
- Start with a sample, then scale
- FAQ
- Sources
Know your curve before you cut anything
Most failed curved wraps trace back to one misjudgment: treating every curve the same. A quick read of the geometry saves you a roll of film.
| Curve type | Examples | What the film has to do | Approach |
|---|---|---|---|
| Single-direction (convex) | Round columns, rounded wall corners, bullnose edges | Bend in one axis only | Minimal stretch, wrap in one piece where possible |
| Single-direction (concave) | Curved reception walls, alcoves, arches | Bend inward, edges tend to lift | Anchor edges, set with post-heat |
| Compound | Domes, sculpted furniture, ornate door profiles | Bend in two directions at once | Controlled heat and stretch, sectional work, relief cuts only where needed |
| Tight radius and recesses | Routed grooves, edge returns | Stretch deeply over a small area | Heat, press with a soft-edge tool, post-heat |
Concave shapes behave differently from convex ones. The film wants to return to flat, so it pulls away from the inside of a curve over time. Convex curves are more forgiving, because tension from the wrap helps hold the film down. The installation guides from film makers say the same: Arlon notes that how well a stretched film holds depends on whether the surface is concave or convex.
If you want a visual primer on what architectural film can do on rounded forms, our piece on how Bodaq interior films transform curved surfaces in design shows the possibilities, and our installer page on curved surface wrapping covers matching method to geometry.
Choose the substrate and film for the job
A curve is only as good as what is underneath it. Bodaq Interior Film is designed for flat, curved and compound surfaces across walls, ceilings, doors and furniture, but the substrate still has to be sound.
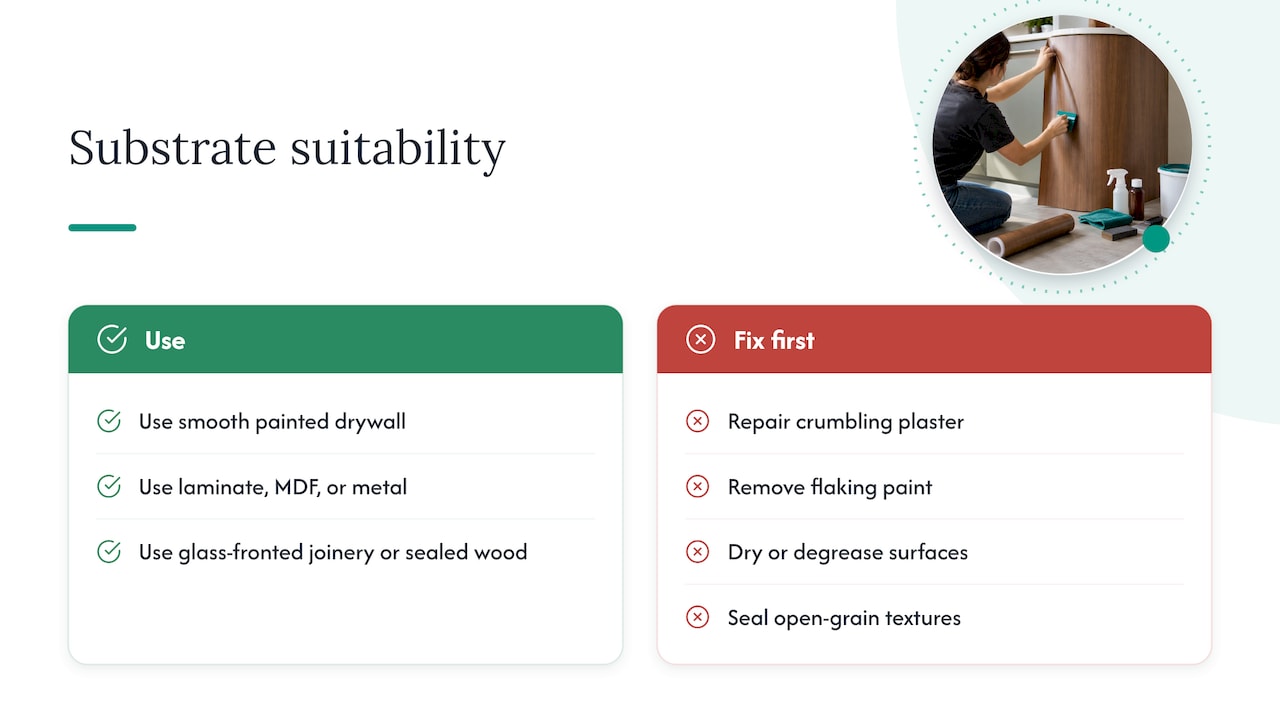
Good candidates: smooth painted drywall, laminate, MDF, metal, glass-fronted joinery, and sealed wood.
Fix first: crumbling plaster, flaking paint, wet or oily surfaces, and open-grain textures that will telegraph through.
Curved furniture and cabinetry are often cut on CNC equipment, which gives clean, consistent radii that are ideal for wrapping. If you are specifying shapes like this, it helps to understand what CNC machining for furniture and cabinetry can produce, because smooth routed edges wrap far more predictably than hand-sanded ones. Sand routed edges, seal any raw MDF, and remove dust before you apply anything.
For pattern choice, think about grain and direction. A wood grain looks natural running along a column’s height but can look awkward if the seam falls on the front. Solid colors, such as Evening Snow S260 or Deep Slate S261, hide stretch and seam placement best. Stone and metal films reward you with a sculptural effect, but veining and sheen show distortion if you over-stretch, so test on a sample first.
The tools that make curves easier
You do not need a van full of gear, but the right few items matter.
- Heat gun with adjustable temperature, or a quality hair dryer for light work. An infrared thermometer is worth having so you are not guessing.
- Soft-edge squeegee or felt-edge tool for pressing without scratching the surface.
- Sharp snap-off blade and spare blades. Dull knives drag and tear film on curves.
- Knifeless tape for cutting lines on finished surfaces without a blade touching the substrate.
- Masking tape and a tape measure for center lines and alignment marks.
- Isopropyl alcohol and lint-free cloths for the final wipe-down.
- Gloves to keep fingerprints off adhesive and the film face.
General installation guides, like this one on architectural vinyl wrap techniques, list much the same kit: knife, squeegee, heat source, isopropyl alcohol and a tape measure.
Step by step: wrapping a curved surface
1. Prep the surface properly
Clean with a mild detergent solution, rinse, let it dry completely, then wipe with isopropyl alcohol. Fill dents and sand them flat. Remove hardware, switch plates and trim where you can. Work in a space that is not extremely cold or hot, because both change how the film and adhesive behave.
2. Measure and cut oversize
Cut the film with several inches of excess on all sides. On a column, wrap the circumference plus overlap if you need a seam, and plan to put it on the least visible side. For furniture, leave extra to wrap onto the underside or back edge, so the finished edge is hidden.
3. Anchor at the center line
Peel back only part of the liner. Position the film, and secure a center line first. Starting from the middle and working outward lets any slack move to the edges, where you can handle it, rather than trapping a wrinkle in the middle of a visible face.
4. Work in sections, from center to edge
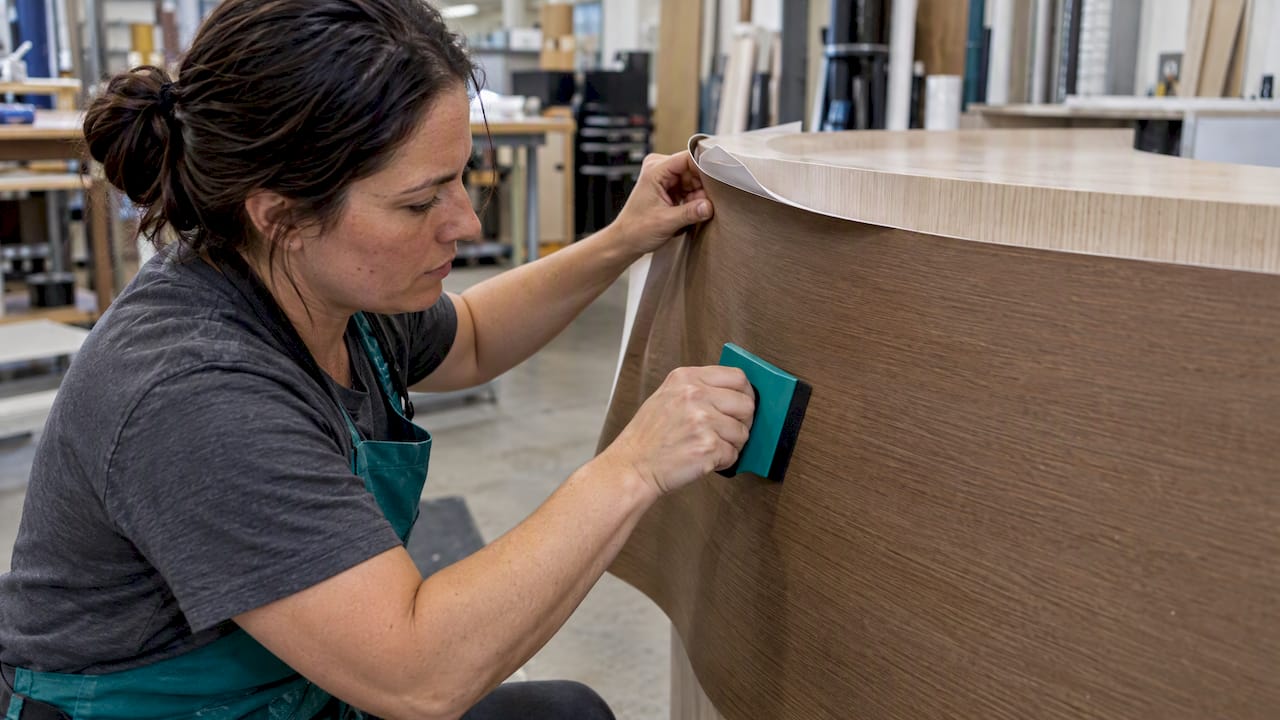
Apply with light, overlapping squeegee strokes. Bodaq’s air-channeled adhesive lets trapped air escape as you press, which reduces bubbles compared with films that lock air in. If you see a ripple forming, stop. Lift gently, relax the film and reapply, rather than pressing harder.
5. Heat to relax, then stretch gently
Heat makes the film pliable. Use it in short passes, keep the gun moving and avoid overheating, which can distort the film or damage the pattern. Film makers publish limits: for example, Arlon’s SLX installation guide lists a stretch heat range of 105°F to 120°F and a maximum stretch of 25%, with the note that the real maximum may be lower depending on the print system. That is a different product from Bodaq, so use it as an illustration of how tight these windows are. For Bodaq, rely on our technical bulletins.
A practical rule: stretch the film only as much as the shape demands, and spread the stretch across a wide area rather than concentrating it. Over-stretched areas look thin, shift in color or sheen, and are the first to fail.
6. Handle compound curves and recesses
Where the film must go in two directions at once, you have three options, in order of preference:
- Stretch and shrink with heat, working from the high point down into the recess.
- Use a hidden seam or inlay in a spot that matches the design, such as a panel break or architectural reveal.
- Make small relief cuts in overhang areas only. Wallpaper installers do the same on arches, cutting every 2 to 4 inches along the overhang, with more frequent cuts for tighter radii.
Never cut into the visible face. Relief cuts belong where the film will be folded around an edge or hidden.
7. Post-heat to set the film
This is the step novices skip. Stretched film has internal memory, so it tries to return to its original shape. Heating it after application, to the temperature range in the manufacturer’s spec, helps set it. Vehicle-wrap guidance puts post-heat ranges in the region of 175°F to 220°F depending on the product, and skipping it can lead to lifting at edges and recesses. Again, confirm the figure for your specific film. Use an infrared thermometer and focus on edges, recesses and the most stretched zones.
8. Trim, tuck and finish
Trim excess with a fresh blade, wrap edges around corners where possible, and press every edge down firmly. Use knifeless tape for clean cut lines on finished surfaces. Give it a final pass with a squeegee, then inspect in raking light, which exposes ripples and lifted edges.
Common problems and how to fix them
- Ripples or wrinkles: the film was pulled too tight or anchored off-center. Lift, relax with light heat and reapply from the center.
- Bubbles: press from the center toward the edge. Small ones can be pushed to the edge through the air channels. Avoid puncturing unless the film maker’s guide says so.
- Edge lifting after a few days: usually insufficient post-heat, a dusty edge, or a concave curve fighting the film. Re-heat and press, and clean the edge before pressing it down again.
- Pattern distortion: over-stretching. Re-cut and reapply, using a solid color or a more forgiving pattern if the shape is extreme.
- White stress marks or thinning: too much stretch concentrated in one place. Replace the section.
The general lesson on curves is the same across film types: patience at the start prevents rework at the end.
Our perspective: why curves are where film earns its keep
We designed Bodaq Interior Film for the surfaces that make renovation difficult. A flat wall can be repainted in an afternoon. A curved reception desk, a rounded column or a sculpted door usually means replacement, new joinery or a lot of specialist labor.
Stretchable, self-adhesive film changes that equation. It lets a design team keep the existing structure and change its character, with less waste and far less mess. The stretchability and the air-channeled adhesive are what make the technique forgiving: you can reposition, press and work out air without fighting the material.
Our advice to installers is simple. Respect the geometry, never treat heat as a shortcut, and test on a sample before committing a full roll. Our collections, from wood and metal to stone and fabric, are built for this kind of work, and a quick sample on your actual curve will tell you more than any spec sheet.
— Bodaq
Why film suits occupied commercial spaces
Curved features show up in lobbies, hotels, restaurants and offices, exactly the places where closing for a renovation costs money. Film is faster and cleaner than rebuilding. In one commercial case study, a 64,000 sq ft window film project was completed in four weeks without business disruption. That is window film, not interior wall film, but it illustrates the principle: surface upgrades can happen around live operations.
For teams planning this kind of work, these pages go deeper:
- Renovating offices with film in hours, not weeks
- Hotel renovations without downtime
- Commercial interior refresh for asset managers
- Film benefits for general contractors
If you are a designer pushing for a bold look, see how statement patterns work in commercial design.
Start with a sample, then scale
Bodaq Interior Film comes in over 450 textures and colors across wood, metal, stone and marble, solid color, and fabric and leather collections. If you are planning a curved project, the smartest first move is to browse the collections, pick two or three candidates and request samples to test on your actual substrate and radius. For a warm, natural look on a column or desk edge, try Natural Oak LW108. For a metallic accent, look at Brass RM008. We also offer installation tools and certified training for professional installers. Prices are quoted per project, so contact us through the site.
FAQ
Can any vinyl film wrap a curved surface?
No. Film needs to be conformable. Rigid or calendared films resist stretching and tend to lift or ripple on curves. Bodaq Interior Film is stretchable and made for curved and compound surfaces, but the tighter the radius, the more important heat and technique become.
Do I need a heat gun to wrap a curve?
For anything beyond a very gentle bend, yes. Heat relaxes the film so it conforms, and post-heating helps set it. A gun with temperature control and an infrared thermometer keeps you inside the manufacturer’s range.
Should I make cuts in the film to fit a curve?
Only as a last resort and only where the cut will be hidden, such as in an overhang that wraps around an edge. Try stretching with heat first, or move the seam to a natural break in the design.
Why does my film lift on the inside of a curve?
Concave curves pull the film back toward flat. The usual causes are too little post-heat, dust at the edge, or over-stretch. Re-clean the edge, heat the film and press it down firmly.
Sources
- Arlon SLX installation guide
- Arlon SLX Plus installation guide
- NGS case study on a 64,000 sq ft film project
- Roman Decorating Products: wallpapering a curved wall or archway
- LCL Films: architectural vinyl wrap installation techniques