
Yes, wrapping kitchen cabinets is a smart move when the boxes and doors are structurally sound. It’s faster and cheaper than replacement, delivers a wide range of finishes, and holds up well when installed correctly. If your cabinets are swollen, warped, or damaged underneath, wrapping only masks the problem. Repair or refacing comes first.
TL;DR:
- Wrapping kitchen cabinets is suitable only if the surfaces are flat, undamaged, and free of moisture issues; otherwise, repairs or refacing are necessary first.
- Proper installation requires specific tools, high-quality vinyl film, and careful preparation, including cleaning, measuring, and heating for conformity.
- Common problems like bubbling or peeling originate from inadequate surface prep, including grease, dust, or glossy finishes, which must be addressed beforehand.
- The cost depends on kitchen size and whether you hire professionals, with DIY taking several days and professional work generally completed in one to two days.
- A high-quality vinyl wrap can last for years if properly maintained, involving gentle cleaning and avoiding heat or sharp objects at seams and corners.
Table of Contents
- What Does Wrapping Kitchen Cabinets Actually Change?
- What Tools and Materials Do You Need to Wrap Cabinets?
- How Do You Wrap Kitchen Cabinets Step by Step?
- Which Finish Should You Choose: Matte, Gloss, Wood, or Stone?
- What Causes Peeling or Bubbling, and How Do You Prevent It?
- How Much Does It Cost and How Long Does It Take?
- How Long Does a Cabinet Wrap Last, and How Do You Maintain It?
- Should You DIY This or Hire a Professional?
- What Safety and Environmental Steps Should You Take?
- Should You Wrap, Repaint, or Reface Your Cabinets?
- How Do You Protect Your Kitchen While You Work?
- Bodaq’s Take: Why Preparation Beats Perfection
- Where to Find Bodaq Film and Samples for Your Kitchen
- Sources
What Does Wrapping Kitchen Cabinets Actually Change?
Architectural film changes color, texture, and sheen instantly. It does not fix structural problems. Think of it as a skin, not a skeleton: it transforms the surface you see and touch, but it can’t straighten a warped door or rebuild a rotted frame.
The best candidates for cabinet vinyl wrap installation are flat or gently profiled doors, drawer fronts, islands, and side panels. These surfaces give the film a stable, even base to grip, which is exactly what makes the finish look factory-applied rather than homemade.
Cabinets in poor condition are a different story:
- Swollen or delaminating MDF won’t hold adhesive evenly and often bubbles within weeks.
- Deeply carved or heavily textured doors make wrapping far more difficult and time-consuming.
- Ongoing moisture problems, like a leaking sink cabinet, will undermine any film regardless of quality.
Get those issues resolved first. Wrapping a compromised cabinet just delays a bigger repair.
What Tools and Materials Do You Need to Wrap Cabinets?
A clean cabinet wrap installation depends on a short but non-negotiable tool list:
- Felt-edge squeegee for smoothing without scratching
- Heat gun or high-powered hairdryer for conforming film around edges
- Sharp utility knife with fresh blades (change often, dull blades tear film)
- Measuring tape and a straightedge
- Isopropyl alcohol and lint-free cloths for degreasing
Material choice matters more than most first-timers expect. Contact paper is thin, has weak adhesive, and shows every imperfection underneath. Architectural vinyl film is thicker, built with air-release channels that let trapped bubbles escape during application, and uses adhesive engineered for long-term bonds on kitchen surfaces exposed to heat and grease.
Bodaq’s collections map cleanly to common goals: wood-grain films like W017 Eucalyptus suit a natural look, stone-effect options work for islands, and solid colors handle busy, high-touch kitchens.
Pro Tip: Buy a small offcut or sample panel before committing to a full order. Practicing your squeegee technique on scrap film saves far more material than it costs.
How Do You Wrap Kitchen Cabinets Step by Step?
Cabinet wrap installation follows a predictable sequence. Rushing any single step is where most DIY jobs go wrong.
- Remove hardware and label everything. Take doors and drawers off their hinges, bag the screws, and label each piece with tape so reassembly is painless.
- Work flat. Lay doors on a table or sawhorses. Gravity fights you when you wrap vertically.
- Clean thoroughly. Degrease with isopropyl alcohol, fill small dents, and lightly sand any glossy finish so the adhesive has something to grip.
- Measure and cut with overlap. Add roughly one to two inches of extra film on each side. If the pattern has visible grain or veining, plan cuts so the pattern flows logically across adjacent doors.
- Apply from the center out. Lay the film down at one edge, then smooth toward the opposite side in overlapping squeegee strokes to push air out ahead of the film rather than trapping it.
- Heat and conform. Warm the film gently around edges and profiles so it wraps corners without stress marks or lifting.
- Trim and seal edges. Cut excess with a sharp blade, then press edges firmly so no lip is left for fingernails or moisture to catch.
- Let it cure. Give the adhesive about 24 hours to cure before rehanging doors or subjecting them to heavy use.
- Reassemble and check seams. Rehang hardware, and inspect every seam in daylight. Small imperfections are easier to fix now than after everything is back on the wall.
Which Finish Should You Choose: Matte, Gloss, Wood, or Stone?
Sheen changes how a kitchen feels under different lighting. Matte film absorbs light rather than bouncing it, which reads as quieter and more architectural, especially under warm, low-level lighting. Gloss reflects light and brightens a room, closer to the look of fresh paint, but it also shows fingerprints and dust more readily.
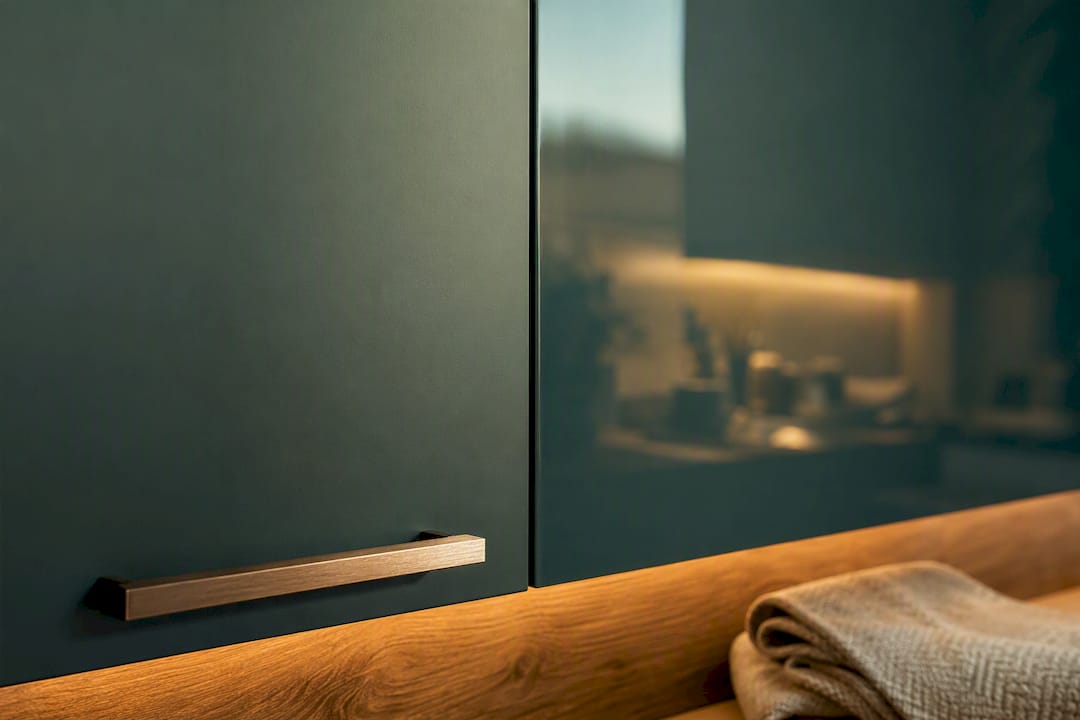
Wood-grain and stone-look films work best when you want texture without demolition. A solid color is the safer choice when you want a clean, uniform look that won’t compete with a busy backsplash or countertop.
A few pairing ideas worth considering:
- Pair a wood-grain finish like Eden Oak on upper cabinets with a darker solid color, such as Deep Forest, on a lower island for contrast.
- Use a stone-effect film like Rustic Stone on an island to anchor the room without wrapping every surface in the same texture.
- Match grain direction across adjacent doors before you cut. Nothing signals a rushed job faster than mismatched wood grain running in opposite directions.
What Causes Peeling or Bubbling, and How Do You Prevent It?
Preparation is the single biggest factor separating a wrap that lasts years from one that lifts within weeks. Grease residue, dust, and glossy factory finishes all block proper adhesion, and inadequate prep is the leading cause of edge lift.
Before applying film, degrease with isopropyl alcohol, lightly sand glossy surfaces with fine-grit paper, and fill dents so the film doesn’t telegraph every flaw underneath. Work in a room between roughly 65 and 75 degrees Fahrenheit. Cold film gets stiff and cracks at corners; hot, humid air can cause adhesive to grab unevenly.
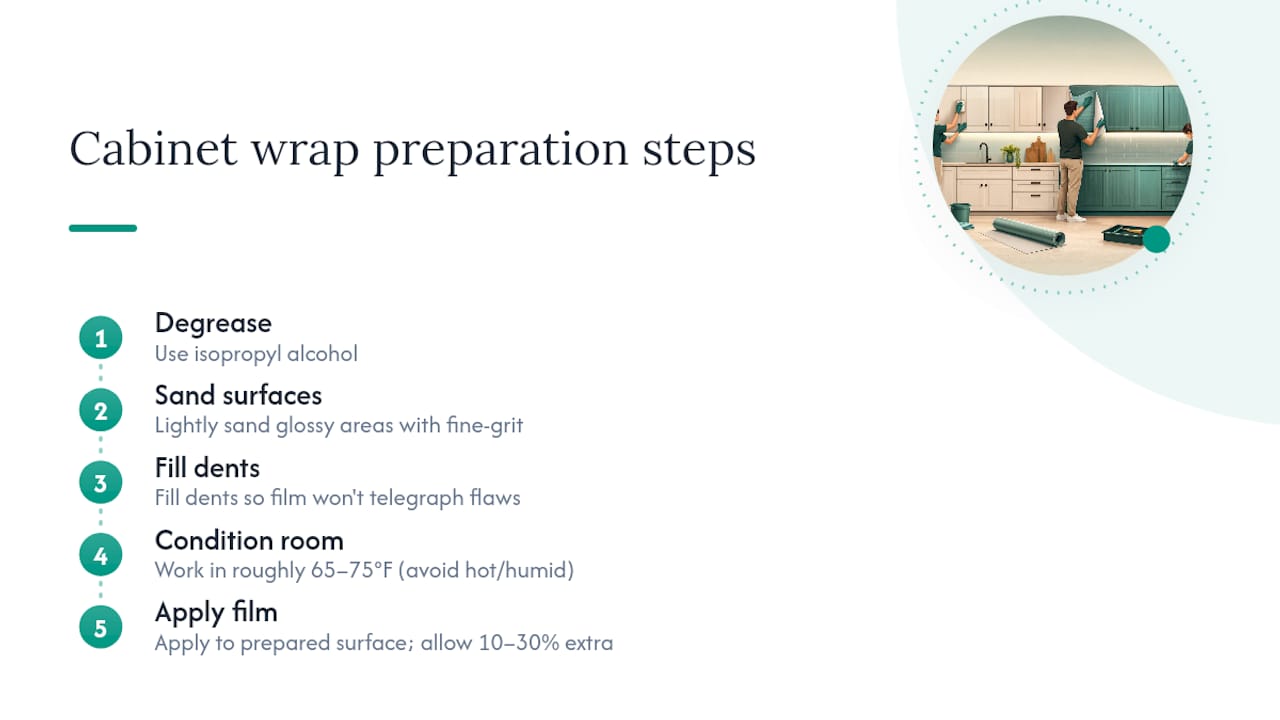
Buy 10 to 30 percent extra material beyond your measured square footage to cover waste, mistakes, and pattern matching.
Pro Tip: If a bubble appears after application, prick it with a pin at a low angle, press the air out toward the hole, and smooth with the squeegee. For lifted corners, gently reheat, press the edge down firmly, and hold for several seconds while the adhesive resets.
How Much Does It Cost and How Long Does It Take?
Budget varies widely depending on kitchen size, door count, and whether you hire it out.
- DIY materials typically run per door or per linear foot of surface, with film costs scaling with the quality and texture you choose.
- DIY time commonly stretches across several days once you factor in prep, curing, and reassembly around normal kitchen use.
- Professional installation usually wraps up in one to two days total, with pricing that reflects labor speed and often includes a workmanship warranty.
Hidden costs sneak in through prep work, hardware replacement, and pattern matching on visible seams. If you’re hiring a professional, ask whether travel time or difficult access (say, a kitchen on a third floor with no elevator) affects the quote.
How Long Does a Cabinet Wrap Last, and How Do You Maintain It?
Quality architectural film holds up for years when installed on stable surfaces and cared for properly. Heat exposure near stovetops, harsh abrasive cleaners, and constant moisture around sinks all shorten that lifespan.
Consumer Reports lab testing found that several tested films didn’t lift when heated or sprayed with water along the edges, and came off cleanly without damaging the substrate underneath during removal testing.
- Wipe with a soft cloth and mild soap; skip abrasive scrubbers and solvent-based cleaners.
- Keep sharp objects away from seams and corners.
- To remove film, warm it gently with a heat gun and peel slowly at a low angle; substrate damage risk rises mainly on porous or previously damaged wood.
Should You DIY This or Hire a Professional?
Run through this checklist before deciding:
- Count the doors. A dozen or fewer favors DIY; a full kitchen with 30-plus pieces favors a professional crew.
- Assess cabinet condition. Any swelling, delamination, or moisture damage means repair first, professional judgment second.
- Be honest about your tolerance for imperfections. A visible seam on a rarely opened pantry door matters less than one on your main island face.
- Decide if you need a warranty. Professional installs typically come with a workmanship guarantee that DIY can’t offer.
When you get quotes, ask about turnaround time, warranty terms, whether they’ll provide a sample panel first, and whether the installer carries any manufacturer certification.
What Safety and Environmental Steps Should You Take?
Architectural film itself is low-odor and doesn’t require the same ventilation precautions as spray paint or solvent-based finishes, which is part of why many homeowners find it a cleaner renovation option. Still, a few precautions matter.
Open a window or run your kitchen exhaust fan while degreasing surfaces with isopropyl alcohol. It’s not toxic in small amounts, but a closed room with heavy solvent use gets uncomfortable fast, and good airflow speeds evaporation before you apply film. If you use a heat gun, keep it moving rather than holding it in one spot. Concentrated heat near certain adhesives or old finishes can release fumes you don’t want to breathe directly.
Wear safety glasses when trimming with a utility knife, especially when cutting near eye level on upper cabinets. A slipped blade at that height is more dangerous than the same slip on a low drawer front.
Disposing of old wrap or leftover film scraps is straightforward. Vinyl film is not classified as hazardous household waste in most municipalities, so it typically goes out with regular trash. If you’re removing an old wrap from a previous renovation, check whether it was applied over a lead-painted surface if your home predates 1978; if so, follow standard lead-safe renovation practices before sanding or heating that layer.
Keep pets and small children out of the workspace while you’re using a heat gun or handling sharp blades. A cluttered kitchen counter with hot tools and loose film scraps is an easy place for an accident to happen.
Should You Wrap, Repaint, or Reface Your Cabinets?
These three options solve overlapping problems in different ways, and the right choice depends on what’s actually wrong with your kitchen.
Repainting works well when your cabinet doors are solid wood or properly primed MDF and you want a completely custom color with brush or spray texture. It’s labor-intensive, though, and paint chips and shows wear at high-touch points like handles and edges faster than film does.
Refacing replaces just the doors and drawer fronts while keeping the existing cabinet boxes. It’s a middle-ground option when you want an entirely new door style, not just a new surface color or texture, but it costs meaningfully more than wrapping since you’re paying for new materials and hardware, not just a surface treatment.
Wrapping wins when your existing doors are structurally sound and you want a wood grain, stone look, or solid color without the mess of paint or the cost of new doors. It’s also the most reversible of the three. A skilled removal can take film off cleanly, which matters if you plan to sell the house in a few years and want flexibility.
If your goal is texture variety without demolition, cabinet vinyl wrap installation is generally the fastest path. If your cabinet boxes are actually falling apart or you’re changing the door style entirely (say, moving from flat-panel to shaker), refacing or replacement makes more sense than wrapping around a problem.
How Do You Protect Your Kitchen While You Work?
Wrapping generates dust from sanding, adhesive residue, and film trimmings, so protecting the space around your work area saves cleanup time later.
Cover countertops near your workstation with a drop cloth or rosin paper, especially if you’re using a heat gun nearby. Tape off backsplash tile and any nearby painted walls with painter’s tape before you start cutting film. A stray utility knife slip can score tile grout or nick paint if the surrounding area isn’t protected.
Set up a dedicated cutting station, ideally a large flat table away from foot traffic, rather than working directly against installed cabinet boxes. This keeps you from cutting into countertops or existing surfaces by accident and gives you room to lay full sheets of film flat.
Ventilate the room by opening windows or running the range hood, particularly during the degreasing and cleaning phase. Keep a shop vacuum or a broom nearby for sanding dust; it travels farther than you’d expect and settles on nearby surfaces you’re not currently treating.
If you’re working in phases, close off the kitchen from the rest of the house with a taped plastic sheet across the doorway. This keeps dust from drifting into living areas, especially useful if you have young children or pets in the home during a multi-day project.
Bodaq’s Take: Why Preparation Beats Perfection
Most wrap failures trace back to skipped prep, not bad technique. A steady hand with a squeegee can’t compensate for grease left on a cabinet door or a rushed cure time. Get the surface right first.
— Bodaq
Where to Find Bodaq Film and Samples for Your Kitchen
If the finishes above caught your eye, Bodaq’s catalog is where you turn ideas into ordered samples. For a warm, natural look, W017 Eucalyptus brings genuine wood grain texture without a single tree cut down. If your kitchen sees heavy daily use, Easy Clean is built for wiping down grease and fingerprints without dulling over time. Want a bold island statement? Onyx delivers a deep, high-performance dark finish, while Rustic Stone suits homeowners chasing a natural stone look without the weight or cost of actual stone slabs.

Not sure which finish fits your cabinets? Request a physical sample before you commit to a full order, and pair it with Bodaq’s step-by-step installation guide so you know exactly what the application process involves before your film arrives. Browse the full collection catalog to compare textures side by side, then order your samples to see how each one looks under your own kitchen lighting.
Sources
- The Best Vinyl Wraps for Revamping Your Kitchen, Tested and Reviewed – Consumer Reports
- How to wrap kitchen cabinets yourself in 5 steps | Homes and Gardens
- The Complete Guide to Kitchen Cabinet Wrapping in 2025 | ArmorKitchenWrap Guides