
For inside corners and panel seams, we recommend a controlled heat-stretch tuck with precision trimming, finished with firm seam-rolling. This combination gives stretchable, self-adhesive film a tight, nearly invisible result at every internal angle. Choose a butt-join where panels meet on a flat, well-aligned substrate, and a micro-overlap where the surface shifts slightly or the pattern needs extra forgiveness. A heat gun, a sharp blade, and a seam roller cover nearly every situation.
TL;DR:
- Controlled heat-stretch tucks create tight, nearly invisible corners, but reheat and re-press to prevent spring-back or lifting over time.
- Using a micro-overlap rather than a butt-join helps accommodate surface irregularities and pattern misalignments on textured substrates.
- Proper seam pressure with a seam roller and reactivation of adhesive with gentle reheating are key to preventing seam separation after installation.
- Extra film length is essential when wrapping returns or meeting other panels, especially for directional patterns like wood grain or veining.
- Essential tools include a variable-temperature heat gun, a sharp blade, a low-friction squeegee, and a seam roller; practicing on samples improves technique.
Table of Contents
- Tools and Materials You Need for Corners and Seams
- Wrapping Inside 90° Corners Without Wrinkles
- Joining Panels: Butt-Join vs. Micro-Overlap Seams
- Fixing Wrinkles, Lifted Edges, and Separated Seams
- What Stretchable Film Changes About Corner Work
- Where to Find Bodaq Film and Samples for Your Next Project
- FAQ
Tools and Materials You Need for Corners and Seams
Clean, durable corner and seam work depends on having the right tools within reach before you make the first cut. A heat gun with adjustable temperature control lets you soften the film enough to stretch without scorching the adhesive or distorting the pattern. A low-friction squeegee pushes air and moisture out ahead of the film instead of trapping it at the corner return, and a seam roller applies even, concentrated pressure along the joint line so the edge bonds flat rather than lifting later.
Keep these on your cart before you start:
- A variable-temperature heat gun for controlled stretching and relaxing film memory.
- A low-friction felt-edge squeegee for directional passes without scratching the surface.
- A seam roller for consistent pressure along butt joins and overlaps.
- Fresh, sharp snap-blades, since a dull blade drags and tears instead of cutting cleanly.
- Isopropyl alcohol or a manufacturer-approved cleaner to strip dust, oil, and residue from the substrate.
Work in a space with stable ambient temperature, since cold substrates resist adhesive activation and overly warm rooms can make the film grab before you’ve positioned it. Good ventilation matters when you’re running a heat gun for extended periods, and gloves plus eye protection are worth wearing any time blades and heat tools are both on the table. For a full breakdown of what belongs in a professional kit, the tools list for Bodaq interior film covers the specifics by project type.
Wrapping Inside 90° Corners Without Wrinkles
Internal corners are where stretchable film either proves its value or reveals a rushed install. The sequence below works whether you’re wrapping a cabinet return or a wall niche.
- Measure generously. Leave extra film at the corner so you have slack to work with, then dry-fit using low-tack tape to confirm placement before committing adhesive.
- Choose your cutting strategy. A single-piece radial cut works for shallow or wide-angle corners where the film can stretch around the bend without excess bunching. Tighter 90° returns usually call for small relief slits cut just shy of the corner point, which let the film fold without tearing.
- Apply controlled heat. Warm the film evenly in the corner zone, keeping the gun moving so no single spot overheats. The goal is pliability, not softness you can dent with a fingernail.
- Stretch in sequence. Pull the film around the corner in stages, working from the center of the panel outward, with directional squeegee passes following each stretch to push out trapped air.
- Tuck and back-crease. Fold the excess into the return, crease it flat against the inside wall, and trim along that crease line for a sharp, finished edge.
- Trim the final edge. Use a fresh blade angled slightly away from the surface so you shave the excess without scoring the substrate underneath.
- Finish with the seam roller. Roll firmly along the corner return to set the adhesive, then reheat briefly and roll again if the film shows any spring-back or memory.
Pro Tip: Reheat the corner one more time after rolling. A second, gentler pass relaxes any residual tension in the film and keeps the corner from lifting over the following days.
When a corner is unusually deep, sharply recessed, or part of a high-traffic edge, consider splitting the wrap into two pieces instead of forcing one panel around the full return. A two-piece corner, joined with a tight micro-overlap right at the fold line, often outlasts a single overstretched piece because it carries less stored tension. The manufacturer’s step-by-step installation guide walks through this decision point in more detail for different substrate shapes.
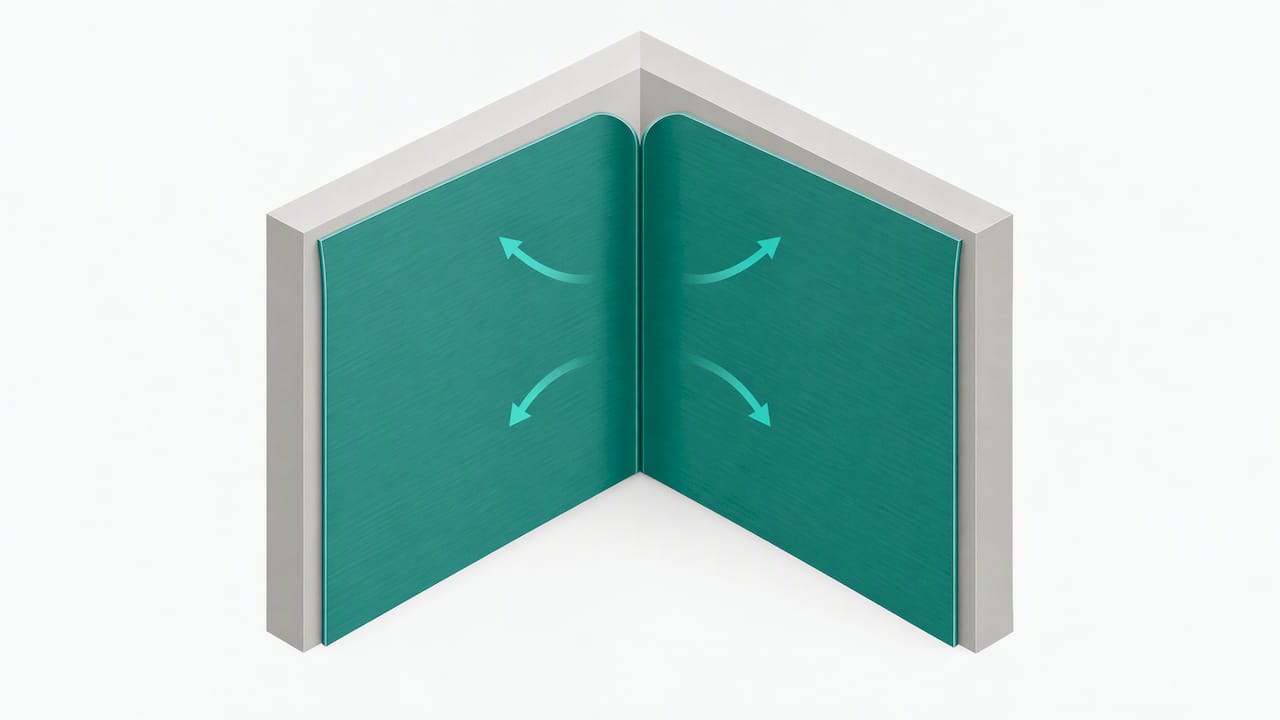
Joining Panels: Butt-Join vs. Micro-Overlap Seams
Picking the right seam method starts with the substrate itself. A flat, well-leveled surface with a simple pattern supports a precise butt-join, where two edges meet without overlap. A substrate with slight waves, or a pattern that needs a bit of play to line up, does better with a micro-overlap, which tolerates small misalignments without showing a gap.
- Butt-join execution: Scribe the cut line on both panels at the exact overlap point, trim with a straight edge guide, and press the two edges together so they meet with no visible gap or ridge.
- Micro-overlap execution: Overlap the second panel by a small amount over the first, just enough to allow a micro-overlap, then seam-roll firmly along the joint so the thin edge beds down flat instead of catching on contact.
- Pattern and grain matching: Mark both panels at a shared reference point before cutting, and leave a small amount of slack near the seam so you can nudge the grain into alignment during the final press.
- Edge treatment: On seams exposed to regular contact, such as counter edges or door returns, a compatible edge sealant or concealment tape adds a buffer against lifting over time.
Wood and stone patterns demand the most attention here, since a misaligned grain line draws the eye immediately. Collections like Deep Walnut Oak and Sierra Stone include directional grain and veining that reward careful pre-marking before the first cut goes down.
Fixing Wrinkles, Lifted Edges, and Separated Seams
Even careful installs run into trouble occasionally, and knowing the likely cause speeds up the fix.
- Wrinkles near a corner usually mean insufficient heat during stretching. Reheat the area gently, re-stretch with a squeegee pass, and roll flat.
- Lifted edges along a seam often trace back to dust, oil, or moisture on the substrate before the adhesive set. Lift the edge, clean underneath with alcohol, let it dry fully, and re-press with the roller.
- Separated seams after a few days typically point to a joint that didn’t get enough roller pressure during finishing. Reheat lightly to reactivate the adhesive, then roll with firmer, slower passes.
- Bubbling from trapped air calls for a small pin-prick release followed by a squeegee pass toward the puncture point, rather than a full re-cut.
- Severe tearing or overstretching at a tight corner means the panel should be re-cut rather than patched, since overstretched film tends to keep pulling at the edges.
Before handing off any job, run a quick prevention check: substrate cleaned and dried, ambient temperature within the manufacturer’s working range, and enough cure time before the surface sees heavy contact. The installation safety guidance covers handling practices for heat tools and blades that reduce both injury risk and rework.
What Stretchable Film Changes About Corner Work
Stretchable, self-adhesive film shifts corner and seam work away from the patch-and-caulk habits of rigid materials. Because the film flexes and conforms under controlled heat, a single sheet can wrap a return that would otherwise need two cut pieces and a filled joint, cutting material waste in the process. We recommend practicing on sample swatches before a live job and pursuing professional installer training, since the technique rewards repetition far more than it rewards reading about it.
— Bodaq
Where to Find Bodaq Film and Samples for Your Next Project
Once you’ve nailed down your corner and seam technique, the collection you choose matters just as much as the method. Solid colors such as Gentle Creme and Evening Snow simplify corner work since there’s no grain to align, while wood options like Natural Oak and Sandstorm Oak reward the extra care a directional pattern demands at a seam.

- Ordering sample swatches before committing to a full roll is advisable, especially for a project with multiple corners.
- Plan for extra film length on any panel that wraps a return or meets another panel at a seam.
- Consider professional installer training if your team is new to heat-stretch techniques.
| Collection type | Example product | Best suited for |
|---|---|---|
| Solid color | Deep Forest | Simple corners, no pattern matching needed |
| Wood grain | Deep Walnut Oak LW109 | Seams requiring directional grain alignment |
| Stone and marble | Sierra Stone | High-visibility panels with veining |
Browse the full interior vinyl film collections to match your next project to the right texture, then start your order through Bodaq Interior Film when you’re ready to move forward.
FAQ
What’s the best method for inside corners on stretchable film?
A controlled heat-stretch tuck, followed by trimming along a back-crease and a firm seam-roller pass, gives the cleanest result on internal 90° corners. Reheating briefly after rolling helps relax any remaining tension in the film so the corner stays flat over time.
Should I use a butt-join or an overlap seam?
A butt-join works best on flat, well-aligned substrates with simple patterns, while a micro-overlap of a small amount handles slight surface irregularities or patterns that need room to align. The step-by-step installation guide walks through both approaches for different panel setups.
Why do seams separate after installation?
Separated seams usually mean the joint didn’t get enough pressure from the seam roller during the original install. Reheating the area lightly to reactivate the adhesive, then rolling again with slower, firmer passes, typically resolves it without a full re-cut.
Do I need special tools for corner and seam work?
A variable-temperature heat gun, a sharp blade, a low-friction squeegee, and a seam roller cover the vast majority of corner and seam situations. The tools list for Bodaq interior film details which tool suits which step of the process.
How long should film cure before heavy use?
Allow the panel to set before exposing the seam or corner to regular contact or cleaning, since adhesive needs time to fully bond after the final roller pass. Checking ambient temperature and cure time together, as outlined in installation safety guidance, helps prevent early lifting.