A kitchen island wrap covers the exposed sides, ends and back of an island with a new surface, so a builder-basic base reads like custom furniture without a remodel. You can wrap with wood panels, tile, thin stone veneer or a self-adhesive architectural film. The right choice depends on how the island is used, how much weight and thickness you can add, and how much downtime you can accept. Below, we walk through the options, the design moves that work, the installation details that make a wrap last, and where architectural film fits.
TL;DR
- A wrap covers the sides and ends of an island (and sometimes the back) so it matches your cabinets or becomes a deliberate focal point.
- Heavy materials such as stone and tile need structural planning. Thin, stretchable film adds almost no thickness and no weight.
- Preparation decides the result: clean, sound surfaces, careful measuring, and sealed or well-finished edges and seams.
- Leave at least 42 inches of clearance for one cook and 48 inches for two, and never bury outlets or seating knee space.
- Bodaq interior film comes in over 450 textures and colors, so you can match wood, stone, metal or leather looks without rebuilding the island.
Table of Contents
- What a kitchen island wrap actually is
- Seven kitchen island wrap ideas worth borrowing
- Choosing a wrap material
- Plan the island before you pick a finish
- How to wrap a kitchen island with film, step by step
- What does a kitchen island wrap cost?
- Our perspective on island wraps
- Ready to wrap your island?
- Finishing touches: hardware and contrast
- FAQ
- Sources
What a kitchen island wrap actually is
People use “wrap” for several different jobs, and it helps to separate them before you shop.
Side cladding is the most common meaning. Decorative panels cover the exposed ends and sides of the cabinet box. Cabinet panels for islands are thin decorative sheets that can match your cabinet doors for a unified look, or contrast in style or color so the island pops and feels built in.
Waterfall or countertop wrap carries the countertop material down the sides. It is the most dramatic version, and also the heaviest and most costly (more on that below).
Surface wrap means covering the existing island surfaces with a thin film. This is where architectural film belongs: the structure stays as it is, and only the skin changes.
The goal is the same in every case. You are changing how the island looks and feels, hiding dated or damaged finishes, and giving the room a stronger center.
Seven kitchen island wrap ideas worth borrowing
We like to think of an island as the one piece of furniture in a kitchen that everyone touches and everyone sees. These are the looks designers reach for most often, with the reason each works and how to pull it off.
1. Warm wood, running vertical
Vertical grain stretches the eye upward, so a low island feels taller and more architectural. It also brings an organic note to kitchens that lean on painted cabinetry and hard stone. Pair it with a slim metal band or a darker toe kick for a tailored finish.
How Bodaq supports it: our wood looks range from pale and honeyed to deep and smoky. Smoked Charcoal Oak LW113 and Deep Walnut Oak LW109 give a long, linear grain that reads convincingly on island ends and backs. For more on the look, see our guide to wood look vinyl films.
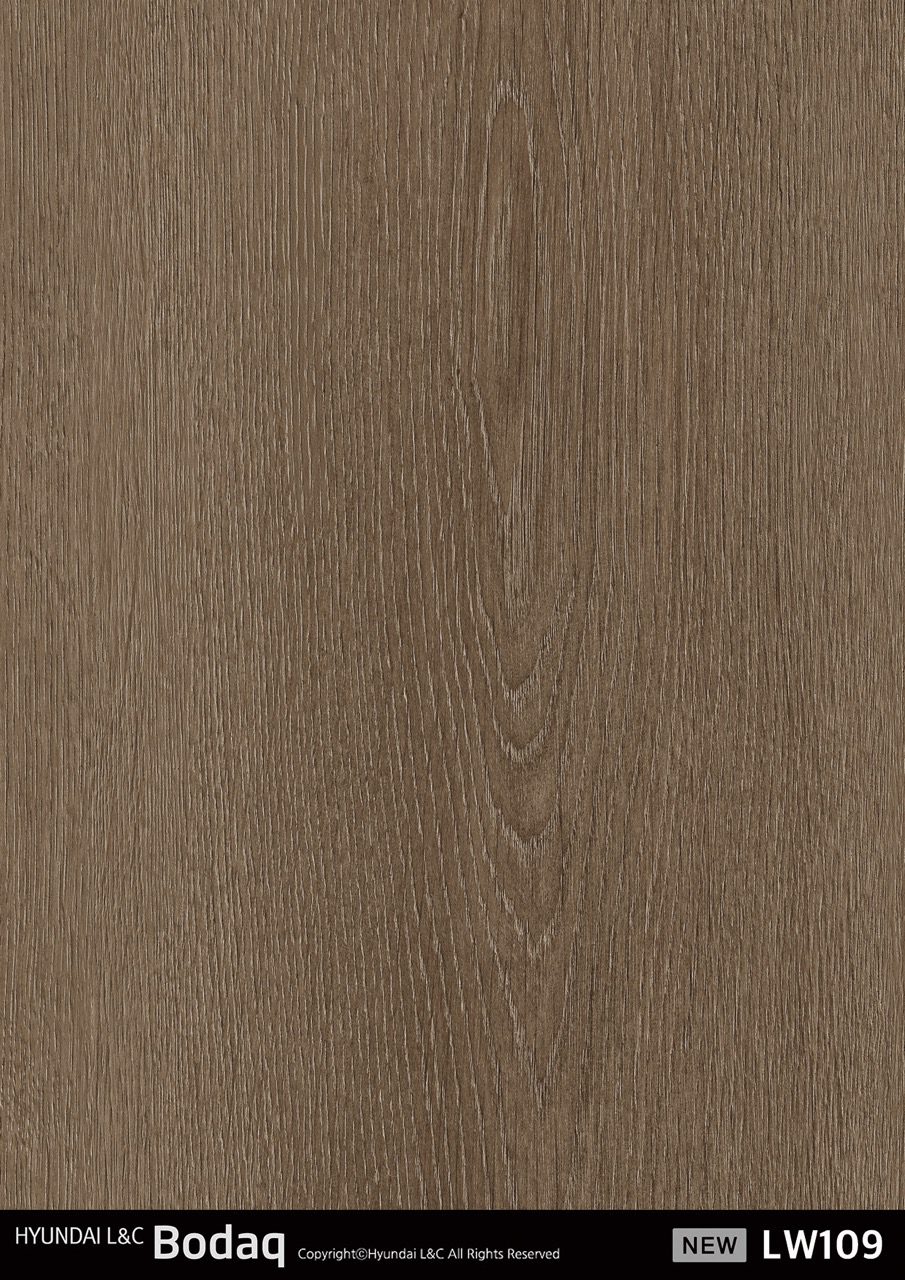
Pro tip: run the grain in the same direction on every face so the island reads as one piece.
2. A contrasting color for a furniture feel
An island in a deep tone against pale perimeter cabinets is a classic way to create a focal point, a little like color drenching confined to a single object. A solid color also keeps the eye calm when the countertop already has movement.
How Bodaq supports it: a solid shade such as Silver Mist S263 offers a soft, modern base. For a busy family kitchen, look at Easy Clean ECF01 from the high-performance line.
Pro tip: hold a large sample against your cabinet doors in both morning and evening light before you decide.
3. Stone and marble looks without the slab
Veined or mottled surfaces create what designers call visual movement. The Charleston Design Center notes that waterfall islands work best with veining, pattern or color variation, because a plain neutral slab can read as a gray block dropped onto the island side. The same logic applies to any stone-look wrap: choose character.
How Bodaq supports it: film gives you the visual of stone on the island faces with none of the weight. Browse Sierra Stone NS123, Elba Stone Cold NS823 or Mono Terrazzo NS715.
Pro tip: if your countertop is stone, pick a wrap that picks up one color from its veining rather than trying to match it exactly.
4. Faux waterfall ends
You do not need a slab to get the waterfall silhouette. Wrapping the island ends in a pattern that echoes the countertop gives the same continuous, sculptural line. Keep the pattern direction consistent where top and side meet.
Pro tip: plan the seam so it lands on the underside edge of the countertop, where it is least visible.
5. Metal accents for a bolder edge
Brushed or velvet metal tones add a glint that suits modern and industrial kitchens, particularly on a single end panel or a base band beneath a wood or stone face.
How Bodaq supports it: Silver Velvet Metal VM903 is a restrained place to start, and our metallic architectural film guide covers finishes and specs.
6. Fabric and leather textures for a cocooning effect
A linen or soft leather texture on the back of an island, the side facing the living area, brings tactile warmth and softens a kitchen’s hard edges. It suits open-plan homes where the island backs onto a sofa or dining table.
How Bodaq supports it: try Woven Linen SF803 or Silver-Ash Linen NF906.
7. Reuse what you already own
Houzz suggests that wood or laminate wrapped around an island is unexpected but warm, and that leftover flooring from a renovation can often cover at least one face. It is a sound way to tie an island to the rest of the room.
Choosing a wrap material
The trade-offs come down to weight, thickness, maintenance and who has to install it.
| Material | Look | Weight and thickness | Maintenance | Typical installer |
|---|---|---|---|---|
| Wood panels or boards | Warm, traditional or modern depending on profile | Moderate, adds about 3/4 inch | Needs a durable protective finish | DIY or carpenter |
| Thin stone veneer or tile | Sculptural, premium | Heavy, needs support and waterproofing | Low | Professional |
| Quartz or stone waterfall | Most dramatic | 3 cm slabs weigh roughly 90 to 140 lbs per side | Low | Fabricator |
| Painted panels or beadboard | Classic, easy to restyle | Light to moderate | Repaint when needed | DIY |
| Architectural film | Wood, stone, metal, fabric, leather or solid | Virtually no added thickness | Wipe clean | DIY or certified installer |
The material notes come from Homestyler’s island wrap guide, which lists engineered wood, thin stone veneer, tile and durable laminates as the usual choices and says heavier tile or stone veneer calls for professional installation to protect structural integrity and waterproofing. The waterfall weight and reinforcement figures come from Texas Specialized Quartz, which describes plywood or steel-rod reinforcement behind vertical panels.
Why film suits island refreshes
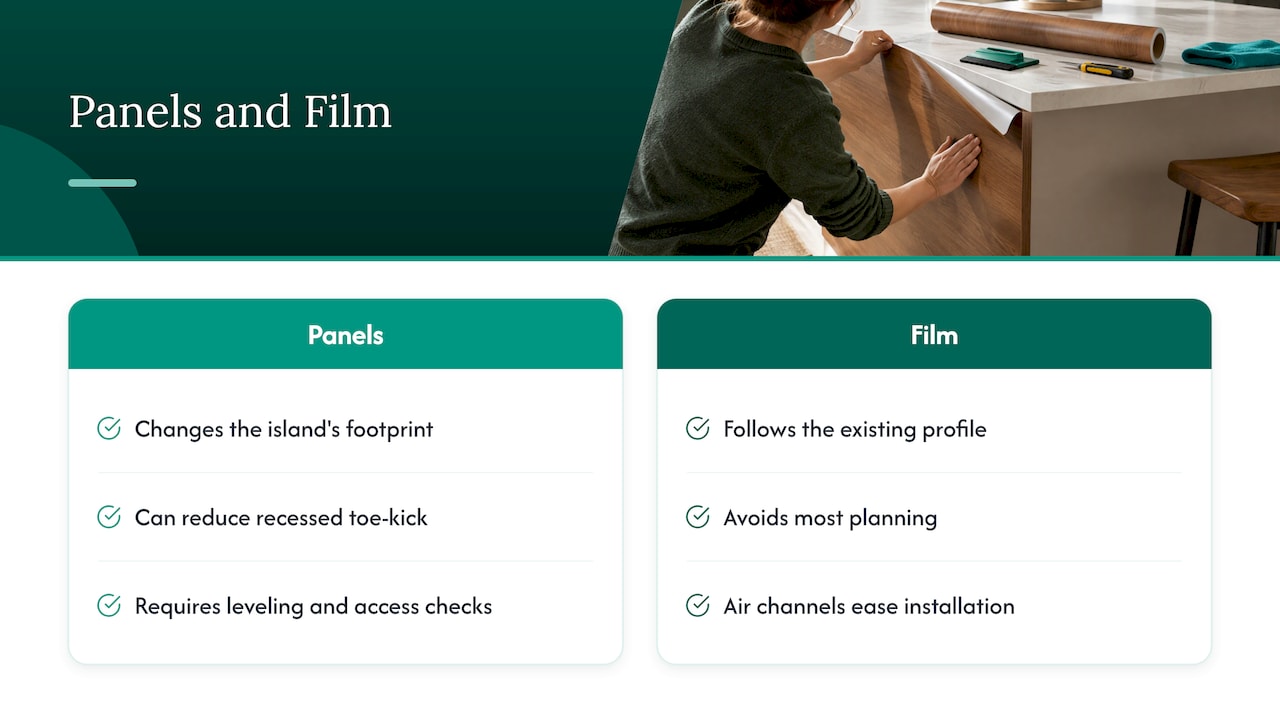
Panels change the island’s footprint. USA Builders Depot points out that panel thickness changes the finished front plane and can reduce a recessed toe-kick area, so you need to check leveling, cabinet access and floor transitions before cutting anything. A stretchable self-adhesive film avoids most of that planning, because it follows the existing profile instead of building on it.
That is the logic behind Bodaq. Our film is stretchable and self-adhesive, and its adhesive is designed with air channels to make installation cleaner and easier. It is built to minimize waste, and it comes in over 450 textures and colors across wood, metal, stone and marble, solid color, and fabric and leather collections. You can see the whole range in our interior film collections or the Bodaq gallery for finished projects.
Plan the island before you pick a finish
A beautiful wrap can still fail on function. Check these four things first.
- Clearance. Homestyler advises leaving at least 42 inches for a single cook and 48 inches when more than one person works in the kitchen. Added panel thickness eats into that, so measure after the wrap, not before.
- Outlets and seating. Homestyler also says to avoid concealing outlets and seating knee space behind permanent cladding. Mark outlet positions and cut openings deliberately.
- Access panels. Per USA Builders Depot, do not block removable access panels, and check the island’s leveling and support system and any applicable clearance requirements.
- Plumbing and appliances. For any change that touches plumbing or appliances, Homestyler recommends consulting a contractor. If a project goes beyond a surface refresh, a professional renovation and build team can handle the structural side while the finish stays a separate decision.
Overhang matters too. If your countertop extends past the island sides, decide whether the new surface sits flush with the countertop edge or tucks slightly beneath it, and mark that line before you start.
How to wrap a kitchen island with film, step by step
The steps below are a general sequence. Always follow the instructions that come with your film, and read our full step-by-step architectural film installation guide before you begin.
- Measure every face. Note height, width, corners, outlets and any trim. Order a little extra for trimming and for matching grain or pattern direction.
- Remove what can come off. Take off trim, hardware and anything that will interfere with a clean edge.
- Clean and repair. The surface should be clean, dry and sound. Fill dents and sand glossy or flaking areas smooth. Where a surface is porous or needs help bonding, a primer such as our Bodaq Water-Based Primer is part of our tool range.
- Cut oversize. Cut each piece larger than the face so you can trim to the edge in place.
- Position and apply. Start from one edge and work across, pressing from the center outward. Our air-channeled adhesive is designed to let trapped air escape as you smooth.
- Stretch into corners and profiles. Gentle heat and stretch let the film follow rounded edges and details without tearing.
- Trim and finish edges. Cut cleanly at the edge, and wrap film around the corner where you can rather than ending it right on the edge. Place any seam on the least visible side.
- Let it settle. Give the surface time before heavy use, as the film guidance advises.
Keep film away from direct heat sources such as the side of a range or a hot appliance, and check the product guidance for your specific film before placing anything hot against it.
If you choose wood panels instead
For boards, DG Floors suggests mounting them over existing cabinet skins with construction adhesive and 18-gauge brads, leaving a 1/8-inch gap at the floor for kick cleaning and expansion. It also recommends a satin kitchen-and-bath enamel for the whole island, because standard wall paint will not survive bar-stool kicks and daily abuse. Fluted or hollow-core panels need compatible corner profiles, since USA Builders Depot warns they cannot be assumed to miter.
What does a kitchen island wrap cost?
Bodaq does not publish film prices on the site, so request a quote through our order form or a dealer. For comparison, here are published figures for other approaches in the US, with the year they apply to.
- Boards and paneling (2026): DG Floors lists pine shiplap or nickel-gap boards at $1.50 to $2.75 per linear foot at Home Depot, and primed MDF at $2 to $3.50 per linear foot. Beadboard sheets run $25 to $48 per 4-by-8 sheet.
- Waterfall slab (2026): The Charleston Design Center says a waterfall island adds $2,000 to $6,000 or more above a standard countertop, depending on material, slab size and whether it is a single or double waterfall.
The real cost of any wrap also includes prep, trim, tools, hardware and your time. Surface wraps usually need less demolition and less downtime, which matters in a home you live in and even more in a hospitality or commercial kitchen that cannot close for long.
Our perspective on island wraps
We see the island as the easiest place in a kitchen to make a design statement, because it is the piece people stand around and touch. Rebuilding it is rarely necessary. A new skin gives you the color, grain or stone character you want while the structure, plumbing and outlets stay exactly where they are.
That is why we built Bodaq around stretchable, self-adhesive film. It conforms to the shape you already have, installation is designed to be cleaner thanks to the air-channeled adhesive, and the film is made to minimize waste. With over 450 textures and colors, you can match your cabinetry for a unified look or choose a deliberate contrast, and carry the same finish into the dining area, a feature wall or a reception desk for a consistent look across a space.
For designers, contractors and property managers, a surface wrap also means shorter disruption and fewer trades on site. For homeowners, it means a considered upgrade without a full remodel. Our guide on kitchen refinishing with vinyl film shows how professionals approach it.
Bodaq
Ready to wrap your island?
Start with the finish. Bodaq interior film is available in wood, metal, stone and marble, solid color, and fabric and leather collections, and you can request samples to hold against your cabinets, countertop and flooring. Browse the full catalog, or learn where to buy and how to install in the USA.

If you are a designer, installer or reseller, we also offer installation tools, a dealer program and certified training. Visit Bodaq Interior Film to see the range and get in touch.
Finishing touches: hardware and contrast
A wrap is only half the picture. DG Floors points out that hardware and finish coordination complete a paneling decision: brushed brass works on shiplap, V-groove and fluted wood, matte black sharpens board-and-batten and recessed panels, and unlacquered brass develops a patina against painted white shiplap over a year or two.
Two more habits help. First, choose a neutral base that lets you change hardware later, as Homestyler suggests, so the island can adapt as your taste does. Second, check the island from every angle in the room, including the view from the living area, before you commit the back panel to a pattern.
FAQ
What is the easiest way to wrap a kitchen island?
A self-adhesive film is the lowest-effort route, because it needs no framing, no adhesive guns and adds almost no thickness. Clean and prep the surface, cut oversize, apply from one edge and trim at the end. Panels are the next simplest, as Homestyler notes that peel-and-stick panels or painting suit DIY work.
Can I wrap the island if it has outlets or seating?
Yes, but plan around them. Mark outlet positions and cut clean openings, and keep seating knee space clear. Homestyler advises against concealing outlets or seating behind permanent cladding.
Should the wrap match my cabinets?
Either works. Matching gives a unified, seamless look, while a contrast turns the island into the focal point, as cabinet panel guides describe. If you are unsure, pick a finish in the same color family as the cabinets but with a different texture.
Do I need a professional?
Film and light panels are manageable for a careful installer, and certified installers can help on larger or commercial jobs. Heavy materials such as stone veneer, tile or slab waterfalls need professional installation, and anything affecting plumbing or appliances calls for a contractor.
How much clearance should I keep around a wrapped island?
Homestyler recommends at least 42 inches for a single cook and 48 inches for multiple cooks. Because panels add thickness, measure after the wrap goes on in your plan.
Sources
- Cabinet Panels 101: Your Complete Guide, Home Decorators Cabinetry
- Top 8 Kitchen Island Wrap Ideas, Homestyler
- Kitchen Island Paneling Ideas, DG Floors
- Waterfall Countertop Islands: Are They Worth It?, The Charleston Design Center
- Waterfall edge quartz and granite islands guide, Texas Specialized Quartz
- Fluted Kitchen Island Panels, USA Builders Depot
- 10 Ways to Refresh Your Kitchen Island, Houzz