Wrapping a ceiling beam means covering the existing beam with a new surface, such as stretchable architectural film, thin wood boards or a hollow faux cover, so it reads as a warm oak timber, a dark metal girder or a clean painted line. The film route is the lightest: no framing, no sawdust and usually no days of lost use of the room. Below you will find how the options differ, what each costs, and the step-by-step prep and wrapping sequence we recommend.
TL;DR
- Film wrap changes only the surface of a beam you already have. Wood cladding and faux covers add a new structure around it.
- Professional faux wood beam installation typically runs $1,500 to $4,000, so a film wrap on an existing beam is a way to refresh a room without a full build-out.
- Prep decides the result: a clean, dry, sound, dust-free surface, a primer where needed, and a plan for seams before you peel any backing.
- Wrap long runs from one end to the other, keep seams on the least visible face, and let stretchable film do the work at corners.
- Structural, fire-rating or moisture questions go to a licensed contractor, engineer or your local building department first.
Table of Contents
- What “wrapping” a beam really means
- Choosing a finish: what should drive the decision
- Surface wrap, cladding or faux cover: a side-by-side view
- What it costs
- Is your beam ready to be wrapped?
- How to wrap a ceiling beam with film, step by step
- Where a wrapped beam holds up
- Practical limits to plan for
- Our perspective
- Ready to choose a beam finish?
- FAQ
- Sources
What “wrapping” a beam really means
Three different jobs share the same name, and mixing them up is the fastest way to blow a budget.
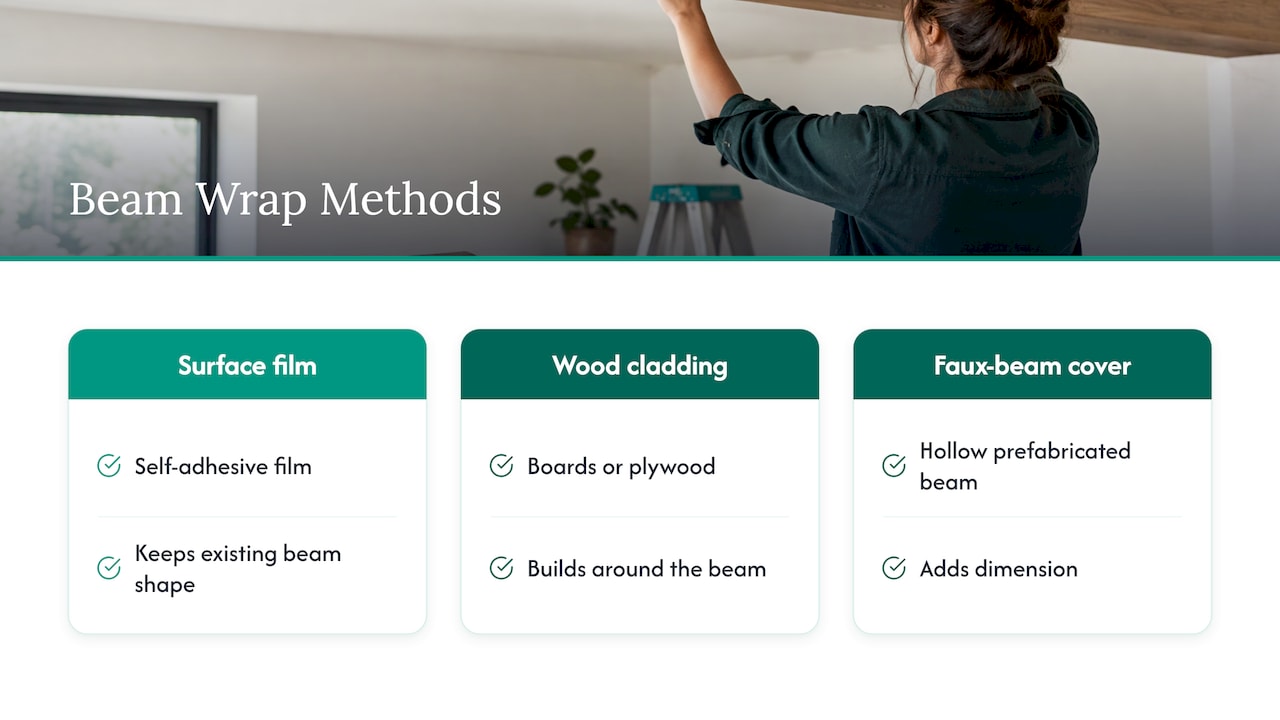
Surface wrap. A thin, self-adhesive film goes directly over the existing beam. Nothing is built, nothing is added to the ceiling load, and the beam keeps its shape. The look changes: texture, grain, color and sheen. This is what we do at Bodaq with our stretchable interior film.
Wood cladding. Boards or plywood are cut, mitered at the corners and fastened around the beam, often over a light frame. You get real wood, but you also get carpentry: measuring, cutting, filling nail holes, staining or painting.
Faux-beam cover. Prefabricated hollow beams, usually polyurethane or foam, are glued or fastened over the existing beam or the ceiling. They add dimension, which is useful when the beam you have is skinny or boxy and you want a chunkier timber look.
The question to ask is simple: do you want to change how the beam looks, or how big it is? If it is the look, a surface wrap is the most direct answer. If you want more mass, a cover or cladding is the better fit, and film can still finish it.
Choosing a finish: what should drive the decision
A beam is a sculptural element that sits overhead, so the finish does more of the room’s talking than you might expect. We suggest choosing in this order.
1. The mood you want overhead
Wood grain is the classic choice. It brings an organic, lodge-to-modern warmth, and it is the reason most people search for beam wraps in the first place. Metal tones turn a beam into an industrial or boutique-hotel accent. Solid colors make a beam recede, a bit like color drenching, where walls, ceiling and beam share one hue and the room feels cocooned. Stone and fabric textures are less common on beams, and that is exactly why they can look bold.
2. The light in the room
Light-toned oaks open a low room. Deep walnut tones add drama in tall spaces with plenty of daylight. Fine grain reads well from the floor, while a coarse, split-wood texture shows more character. Look at samples overhead, not on a desk, because beam faces catch light at a sharp angle.
3. The look of the nearby surfaces
The beam should echo something below it: flooring, cabinetry, a door or a mantel. This is where a single film family pays off, since the same pattern can run across a beam, a door and a kitchen island for a brand-consistent result.
Bodaq finishes that suit beams
We offer over 450 textures and colors, and a handful make natural starting points for overhead work:
- Natural Oak LW108 for a light, honest timber look.
- Deep Walnut Oak LW109 for a richer, darker beam against pale ceilings.
- Driftwood Oak W956 for a weathered, softer grey-brown tone.
- Split Wood SPW50 for a more rustic, textured grain.
- Bronze RM011 for a warm metallic accent in commercial or loft-style rooms.
Surface wrap, cladding or faux cover: a side-by-side view
| Film surface wrap | Wood cladding | Faux-beam cover | |
|---|---|---|---|
| What changes | Look and texture only | Look and size | Look and size |
| Added structure | None | New frame and boards | Hollow shell |
| Skills and tools | Cleaning, measuring, squeegee, blade | Saw, miter cuts, fasteners, finishing | Adhesive, fasteners, cutting to length |
| Mess and downtime | Minimal | Sawdust, finishing, drying time | Moderate |
| Easy to change later | Yes, you can refinish with another film | Hard | Moderate |
| Best for | Refreshing existing beams, rentals, hospitality, offices | Real-wood look and feel | Adding visual mass where there is none |
For the properties we operate in, hotels, offices, shops and busy homes, the decisive column is usually downtime. A surface wrap keeps a lobby or a living room usable while the work happens, which is the point of choosing film in the first place.
What it costs
For the cover-and-cladding route, published U.S. figures give a useful ceiling. HomeAdvisor reports that professional faux wood beam installation costs $1,500 to $4,000, averaging $3,000, with prices around $15 to $35 per linear foot and a DIY project running $1,300 to $3,300 in total.
A film wrap on an existing beam sits in a different cost category, because you are paying for surface material and labor, not a new beam. We do not publish film prices on our site, so ask for a quote based on your beam lengths and your chosen pattern. Our architectural wrap pricing guide explains how per-square-foot pricing is built, which helps you convert a beam’s three exposed faces into a realistic area.
A quick way to size a job:
- Measure the width of the beam’s bottom face and the height of each side face.
- Add them together to get the wrapped perimeter in inches, which excludes the face against the ceiling.
- Multiply by the beam length in feet, divide by 12, and you have square feet.
- Add 10 to 15 percent for seams, trimming and mistakes.
Example: a beam 6 inches wide and 8 inches tall, 12 feet long. Perimeter is 6 + 8 + 8 = 22 inches. 22 x 12 / 12 = 22 square feet, so plan for roughly 25 square feet. Several beams add up fast, so run the arithmetic for the whole room before you order.
Is your beam ready to be wrapped?
Most surface wraps go well on beams that are structurally sound and stable. A few conditions deserve a pause.
Moisture. A beam that stains, sweats or shows leak marks has a water problem that no finish should hide. Find and fix the source first. Our moisture-resistant wall finish guide walks through an adhesion test approach that applies the same logic to any surface you plan to wrap.
Engineered lumber and warranties. If your beams are engineered wood, such as LVL, read the manufacturer’s policy before covering them. Boise Cascade, for example, states that wrapping its engineered wood members in a way that allows moisture absorption is not allowed and would void the product warranty, and treats interior conditioned-space products as dry use. In a conditioned room that is rarely a problem, but check the maker’s guidance for your product and ask your builder.
Structure and code. Never notch, cut or drill a structural beam to make a wrap fit. If you are unsure whether a beam is carrying load, or you are adding a heavier cover that needs new blocking, have a licensed contractor or structural engineer look at it. In commercial interiors, finishes may need to meet flame-spread classes. Our ASTM E84 and IBC Chapter 8 guide explains what architects check, and your local building department has the final word on what your project requires.
Old finishes. Peeling paint, loose varnish, heavy wax or oily residue will let go and take your film with them. Strip, sand or seal until the surface is firm.
How to wrap a ceiling beam with film, step by step
The sequence below is how we suggest approaching a typical rectangular beam. Always follow the installation instructions that come with your film and primer.
Step 1: Plan the seams on paper
Walk the room and decide which end is the starting point and which face is least visible. The bottom face is seen most, so it should be the cleanest, ideally one continuous piece. Seams can sit along the inside upper edge of a side face, or at a natural break such as a joint or a bracket. If your beam is longer than a roll width allows, plan to join at a spot you will barely notice.
Step 2: Clean and degrease
Vacuum dust from the beam and the ceiling line, then wipe with a cleaner suited to the surface. Let it dry completely. Dust is the most common reason for bubbles and lifted edges overhead.
Step 3: Repair and smooth
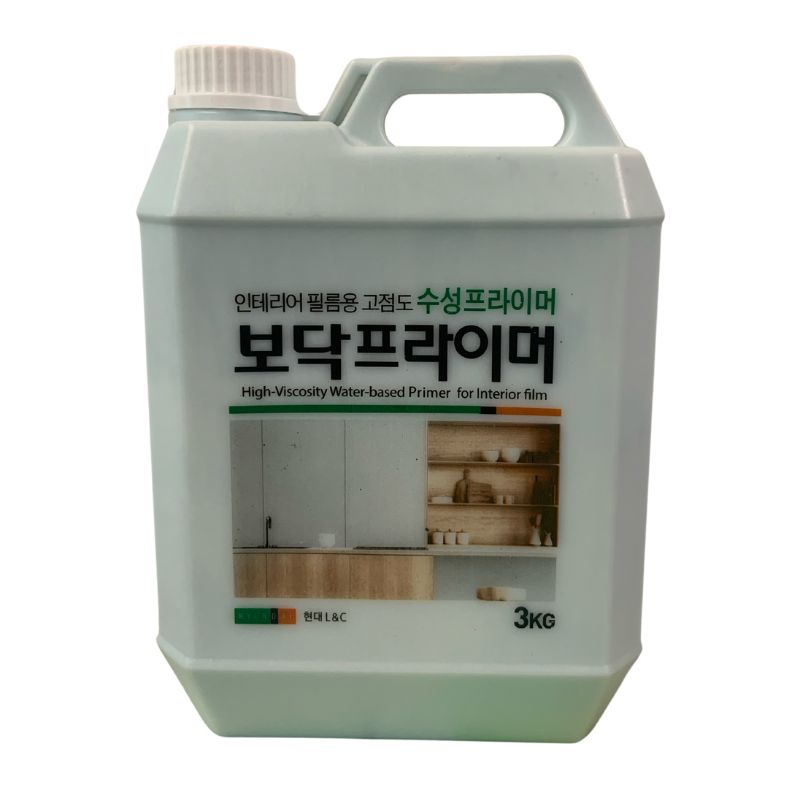
Fill holes and dents, sand rough grain and nail heads, and remove any trim or hardware you can take off. Texture shows through film, so a smoother substrate gives a smoother result. Rough, porous or dusty surfaces benefit from priming. We make a water-based primer for this step, and our wall wrap installation guide covers how the primer fits into a clean installation.
Step 4: Cut the film with room to spare
Measure the full perimeter you will wrap and cut each piece a few inches longer than needed at both ends. It is far easier to trim excess than to stretch short film. Keep the pattern direction consistent so the wood grain runs along the length of the beam, as real timber does.
Step 5: Start with the bottom face
Peel back a short section of the liner, align the film, and press from the center outward with a squeegee. Our film uses an air-channeled adhesive designed to let trapped air escape, which makes repositioning and smoothing more forgiving. Work in sections rather than removing the whole backing at once, and keep your tool angled so you push air ahead of it.
Step 6: Wrap up the sides and over the edges
Bring the film up one side face, then the other, overlapping slightly along the upper edge if you planned a seam there. At the bottom corners, the film’s stretch lets it follow the edge without cutting. Apply gentle, even pull rather than a hard stretch, so the grain pattern does not distort.
Step 7: Handle the ends and tricky spots
At a wall junction, trim a hair short of the wall and tuck the edge with a plastic tool. Around brackets, light fixtures or fan boxes, make relief cuts instead of forcing the film to fold. Rounded or chamfered corners are easier than sharp ones, and a heat source used lightly as the instructions allow can help film conform to curves.
Step 8: Trim, press and inspect
Trim with a fresh, sharp blade, using a straightedge where you can. Press every edge down firmly and look along the beam from a low angle, because overhead light reveals bubbles and edge lifts. Give the adhesive the time the product instructions specify before cleaning or touching it again.
Safety while you work
A beam sits above head height, so use a stable platform ladder or scaffold, not a chair. Keep your blade away from your supporting hand and cut away from your body. Turn off power to any fixtures you will work around.
Where a wrapped beam holds up
Film on a ceiling beam is out of reach of daily traffic, which removes the wear problem that walls and doors face. What affects its long-term look is mostly the environment: heat from nearby fixtures, steam over a kitchen or bath, direct sun through a large window and the cleanliness of the surface at install. Choose a finish with that in mind, keep beams away from sources of high heat, and dust them with a soft cloth.
Our film is designed for durable, high-traffic interiors, and our wall wrap installation guide lays out the cleaning and prep habits behind a long-lasting result. If your beam wraps are part of a bigger refresh, the same logic extends to column wraps, door jambs and cabinet fronts, which lets one material tie the whole room together.
Practical limits to plan for
A wrap changes how a beam looks, not how it performs or how tall it is. If a beam is crooked, warped or sagging, film will follow the shape, so you may want to correct it first. If you want a deeper, chunkier timber, add a cover or cladding underneath and finish it with film. Ceilings in older homes may have uneven plaster or textured surfaces along the beam edge, so the line where film meets ceiling needs patience and a clean trim. And any change that adds weight, such as real wood cladding or heavy covers, should be reviewed by a qualified professional for support.
Our perspective
We built Bodaq film for exactly this kind of problem: a surface that is structurally fine but visually tired, in a room you cannot afford to shut down.
Beams are a good example. People assume the choice is between tearing out and rebuilding, or living with dark, dated timber. A stretchable, self-adhesive film opens a third path. The beam stays, the room stays open, and the finish changes from tired to tailored, the design equivalent of a well-cut garment.
What we care about most is the installation experience. Stretch lets film follow edges and corners. Air-channeled adhesive helps you push out bubbles instead of chasing them. Careful prep and a primer, where the surface calls for one, give the film the foundation it needs.
With over 450 textures and colors, you can go warm and organic with oak, sculptural with metal, or quietly drenched in a single color. And because the same films work on doors, columns, cabinets and walls, a beam can become part of a consistent design language instead of a one-off.
Bodaq
Ready to choose a beam finish?
If you are planning a beam refresh, start with samples held against the beam itself, in the light of your own room. Browse our wood collection and other finishes, or download the Bodaq catalog to compare patterns side by side. Designers, property managers and installers can also contact us about samples, tools and dealer or training programs.

For a bigger commercial renovation, our commercial wall wrap cost guide shows how film can shorten schedules and trim budgets compared with demolition and rebuild.
FAQ
Can you wrap a ceiling beam with vinyl film?
Yes, on a sound, clean, dry beam. Prepare the surface, prime it where it is rough or porous, and plan seams before you start. Our stretchable film is designed to follow beam edges and corners without heavy cutting.
Is wrapping a beam cheaper than installing faux beams?
Often, because you are not buying and mounting a new beam. HomeAdvisor puts professional faux wood beam installation at $1,500 to $4,000. Request a film quote based on your beam area to compare it with your own project.
Where should the seams go?
Put them where eyes land least: along the upper edge of a side face, at a joint or at a natural break. Keep the bottom face as one continuous piece when you can, and run wood grain along the length of the beam.
Do I need a professional?
For the film itself, many careful installers handle simple beams. Call a licensed contractor or structural engineer if the beam is carrying load and you want to change it, if you see moisture damage, or if the project adds weight. In commercial spaces, check finish requirements with your building department or architect.
Can I wrap engineered beams such as LVL?
Often yes in dry, conditioned interiors, but read the manufacturer’s guidance first. Some makers restrict coverings that trap moisture and tie warranty coverage to it, so confirm with the product’s maker before you wrap.
Sources
- How Much Does It Cost to Install Faux Wood Beams? (HomeAdvisor)
- Exterior Exposure Policy for Engineered Wood Products (Boise Cascade)